Sun Prints

title_bt_line
(Disclaimer: This page contains Amazon Affiliate links. If you make a purchase from one of the links, Habitot will receive a small commission at no extra cost to you.) 


A sunny day is a great opportunity to make art and try science experiments outdoors. Creating construction paper sun prints is a simple activity that lets your child observe the effects of sunlight on objects.

What We’re Learning & Skills We’re Building 

  • Solar science – studying the sun, its energy, and its effects on objects 
  • Chemical change – ultraviolet light from the sun causes some chemicals (like the dye in colored construction paper) to change in color 
  • Cause and effect – sunlight causes colored paper to lighten; adding objects to the paper shades parts of it from the sunlight causing prints to appear later 
  • Comparison – observing the difference between the paper’s color before being exposed to sunlight and after it’s been sitting in the sun for 2-3 hours
  • Language acquisition – learning words and phrases such as “fade,” “emit,” and “ultraviolet light” 
 

Materials

  • Dark-colored construction paper (dark blue, red, purple, and black paper work best)
  • Small, flat objects (flowers, leaves, keys, earrings, etc.) 
  • Outdoor or indoor space that gets sunlight for 2-3 hours

Optional Materials 

  • Tray, baking sheet, or large piece of cardboard
  • Plastic wrap
  • Stones or bricks for weight
  • Crayon, pencil, marker, or ink pen
 

Making Sun Prints Together 

  1. Collect several small, flat objects (flat objects with holes and jagged edges – like leaves – make the clearest prints, but some 3D objects will work, too). 
  2. Find an outdoor or indoor area that gets at least 2-3 hours of full sunlight. 
  3. In this sunny spot, place the construction paper on a flat surface. (Note: Use a tray, a baking sheet, or a piece of cardboard if there are no flat surfaces.) 
  4. Place the objects about 1” to 2” apart on the paper. 
  5. (Optional) Cover the paper and the objects with plastic wrap (this will help keep them in place in case there’s a breeze). Flatten them as much as you can with the plastic cover. 
  6. (Optional) Place stones or bricks on the corners of the plastic-covered paper to weigh it down, if needed. 
  7. Let the paper sit in the sun for 2-3 hours. 
  8. After this time, remove the objects from the paper to reveal the sun prints!

Discovering Together

  • Have your child look closely at the paper before they remove the objects. Ask, “Has anything changed? Is the paper the same color as it was before we left it in the sun?”
  • When removing the objects, point out the parts of the paper that have faded and the parts that haven’t changed. Ask, “Why do you think the paper hasn’t changed in the places that were covered by the objects? What do you think caused the color of the paper to fade or lighten?” 
  • After creating the sun prints, your child can trace around the prints with a crayon, a pencil, or a marker. They can ask other people to guess which item created which print.
  • Try the same activity again, but this time leave the paper in a shady spot for 2-3 hours. Have your child compare the paper left in the shade with the paper left in the sun. Talk together about why the two might look different.
     

What’s Happening? 

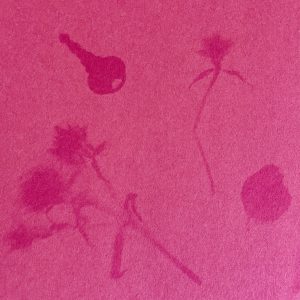
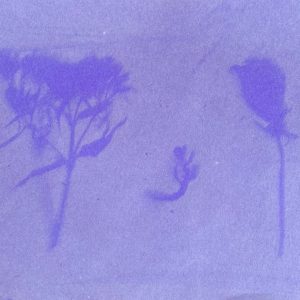
The sun’s energy is so strong, it’s able to break down (change) the chemicals of the dyes used in colored construction paper. This chemical change causes the dyes to fade, or become lighter in color. The spots on the paper covered with objects are shaded from the sun, so they don’t fade. The sun emits (sends out) a type of energy called ultraviolet light – humans can’t see this light, but we can sometimes see its effects, such as how it lightens the color of the paper. Ask, “Can you think of other things that change color when exposed to sunlight for a long time?” (Examples: skin and hair, wood, plastic, etc.)

Check out this educational webpage about the sun and ultraviolet light for more learning!