
(Disclaimer: This page contains Amazon Affiliate links. If you make a purchase from one of the links, Habitot will earn a small commission at no extra cost to you.)
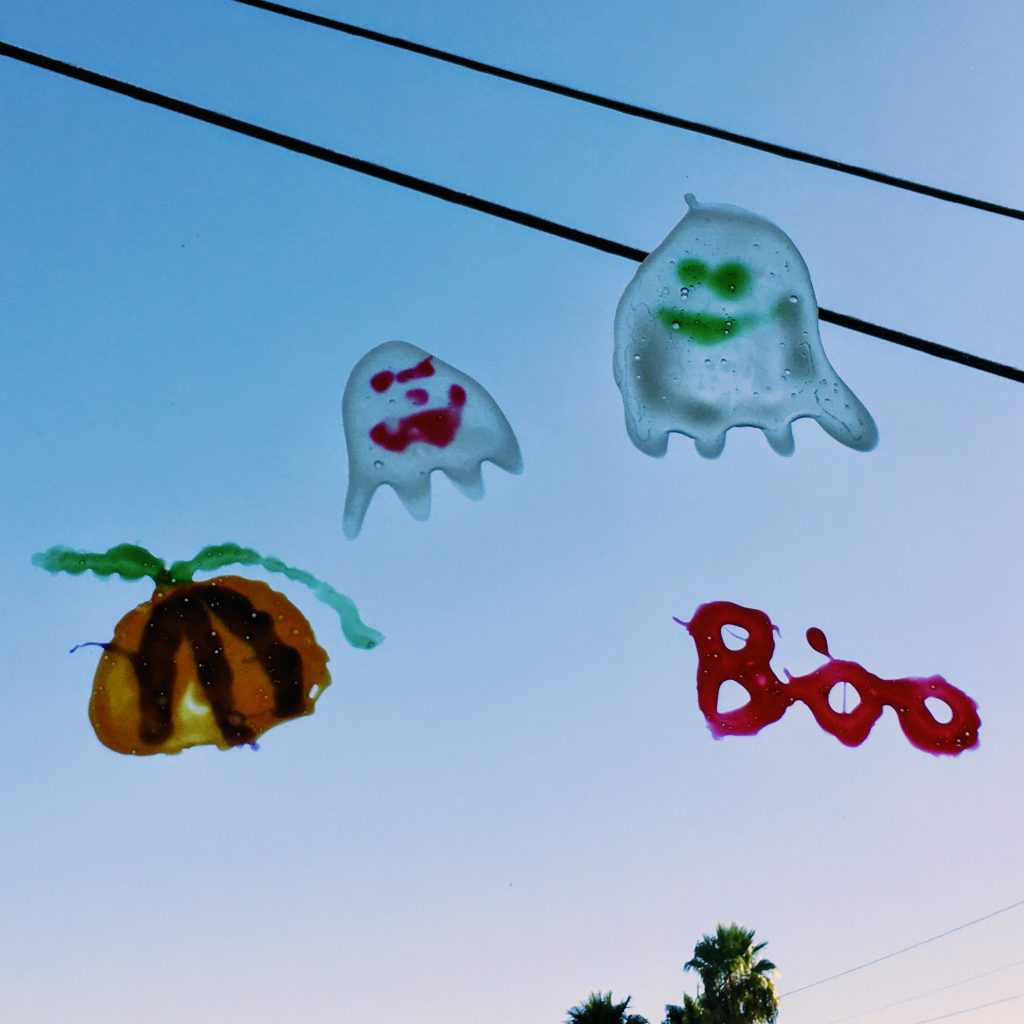
Make festive window clings from glue! Your child will practice motor skills, color mixing, and collaboration while making sticky, fun Halloween decorations that can be displayed on any glass surface.
What We’re Learning & Skills We’re Building
- Fine motor skills – using the small muscles in the hands to squeeze glue bottles and hold a paintbrush
- Color mixing – mixing 2 or more colors together to create new colors
- Creativity – using your imagination to create something unique
- Collaboration – working together to mix glue and paint, create shapes, and squeeze glue bottles
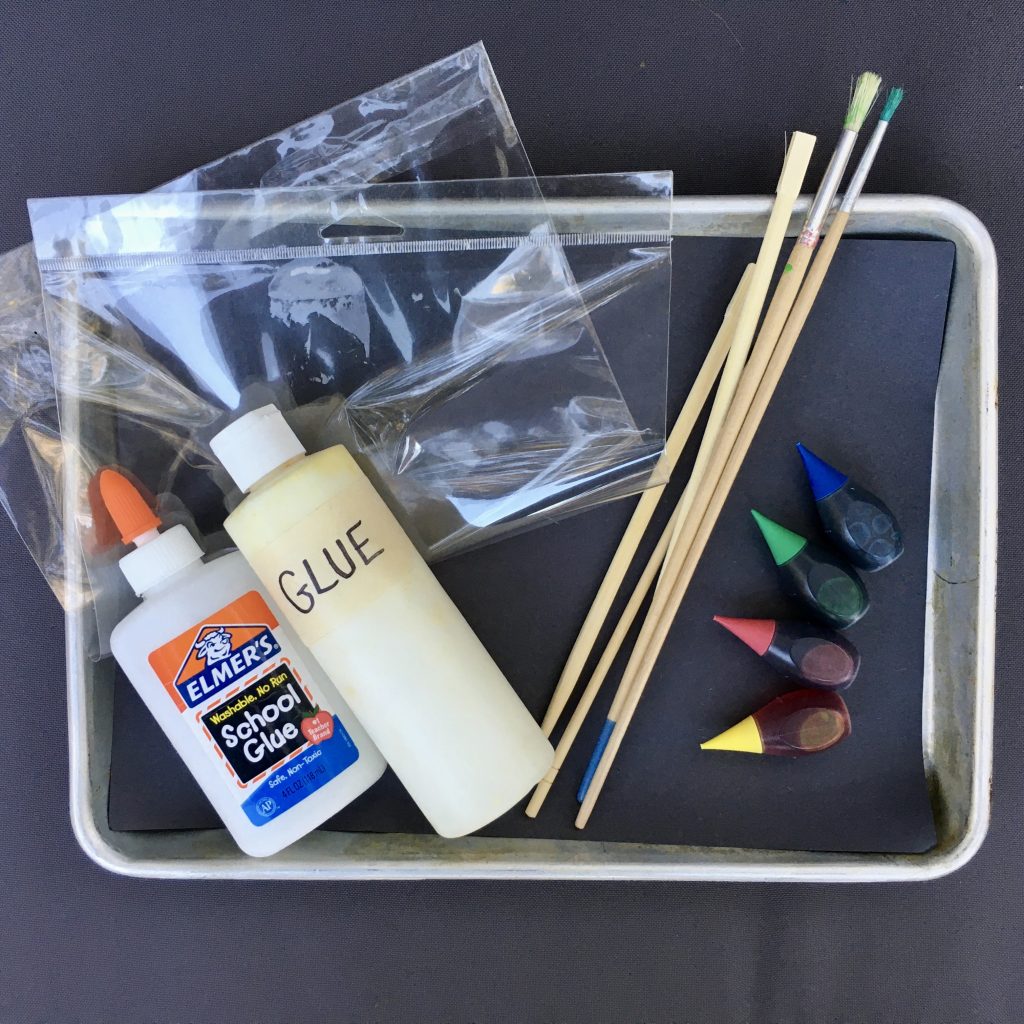
Materials
- White or clear liquid school glue (in a squeeze bottle)
- Food coloring or liquid watercolors
- Paintbrush, thin dowel, or chopsticks for mixing
- Clear film (transparency sheets, large ziplock bag, taut plastic wrap, or cling wrap)
- Art tray or rimmed baking sheet to work on top of
Optional Materials
- Additional squeeze bottles
- Small Ziploc bags
- Small bowls
- Paintbrushes
- Stencils and cutouts
- Jar lids, drink tops, blocks, toys, cookie cutters, etc.
Making Colorful Glue
- Add a few drops of food coloring or liquid watercolor paint to the glue bottle(s) and mix them together using a paintbrush, a thin dowel, or chopsticks. (Note: Don’t add more than 5-6 drops of color or else the glue could be too liquidy to hold its shape!)
- (Alternative Option) Mix glue and colors together in a small Ziploc bag. Seal it shut, then cut off one of the corners to create a small hole for the glue to be squeezed from.
- (Another Alternative Option) Mix glue and colors together in small bowls. Use paintbrushes to make shapes and designs.
Making the Window Clings
- Place the clear film on top of a flat surface. (Optional: If you’re using cutouts or stencils, slide them underneath the clear sheet.)
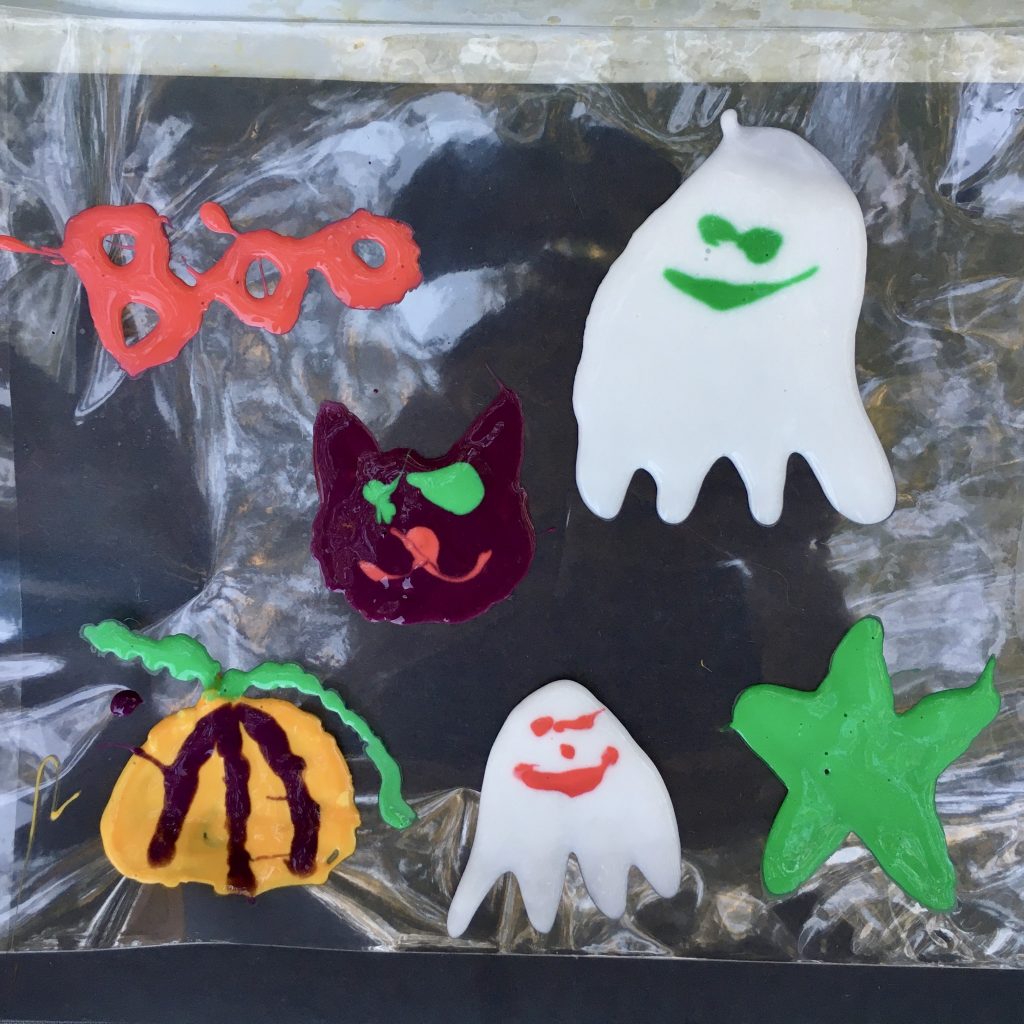
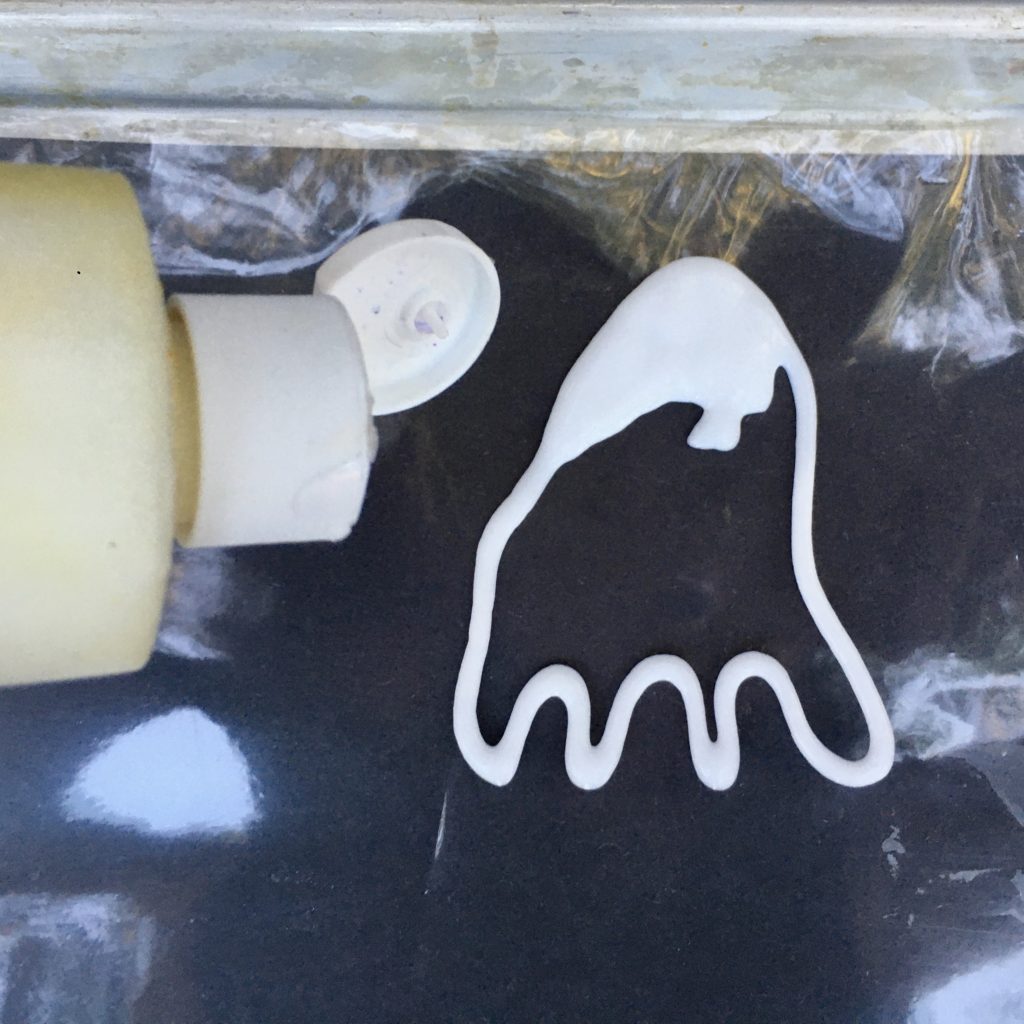
- Create shapes and designs by squeezing the glue onto the plastic sheet in a continuous line. (Trace over the top of the cutouts or stencils with the glue.) Fill in the shapes completely or leave them as simple outlines. Add details and other colors.
- Once you’re done making and decorating the shapes, carefully place the sheet in a cool, sheltered spot to dry for about 6-12 hours.
- When they’re completely dry, slowly peel the shapes from the film.
- Stick the homemade Halloween window clings on any glass surface to display!
- For storage, place the shapes between sheets of plastic wrap and store them in a cool, dry spot.
Cleanup: Liquid school glue should be washable with soap and water. However, if it gets on carpet, clothing, or other fabrics, a mixture of warm water, dish soap, and white vinegar will easily dissolve it.
Practicing Fine Motor Skills
- Squeezing glue bottles might be difficult for younger children. If your child has difficulty squeezing out the glue, thin it out by mixing in a few drops of water.
- Contrarily, if your child is interested in squeezing all of the glue out of the bottle, fill up a squeeze bottle with just water. Let them squeeze this bottle in an area that’s easy to wipe up, such as on a cooking tray, in the bathtub, or over a sink. This is great fine motor skill practice!
- Drawing shapes by squeezing glue can be challenging for children of all ages. Have your child draw the shapes with a glue-covered paintbrush first, then squeeze more glue over the shapes.
- A very young child with emerging motor skills can dip a small jar lid or drink top into a bowl of glue, then use the lid as a stamp to create circles. Blocks, toys, and cookie cutters can also be used as glue stampers.