
Disclaimer: This page contains affiliate links. If you make a purchase from one of the links, Habitot may earn a small commission at no extra cost to you.
Every February in Habitot’s Art Studio, families were invited to make art using a well-known shape: the heart! Today, we’re sharing how to make Salt & Glue Hearts, one of our favorite heart-themed art activities for you and your child to do at home. And check out Habitot’s Facebook and Instagram pages more heart-themed art activities this week!
What We’re Learning & Skills We’re Building
- Creativity – Using your imagination to come up with designs and color patterns
- Fine Motor Skills – Using the small muscles in the hands to grip and squeeze pipettes and paintbrushes
- Absorption – Seeing the watercolor paints spread out over lines of glue and salt
- Experimentation – Trying different ways of using the materials to see what happens
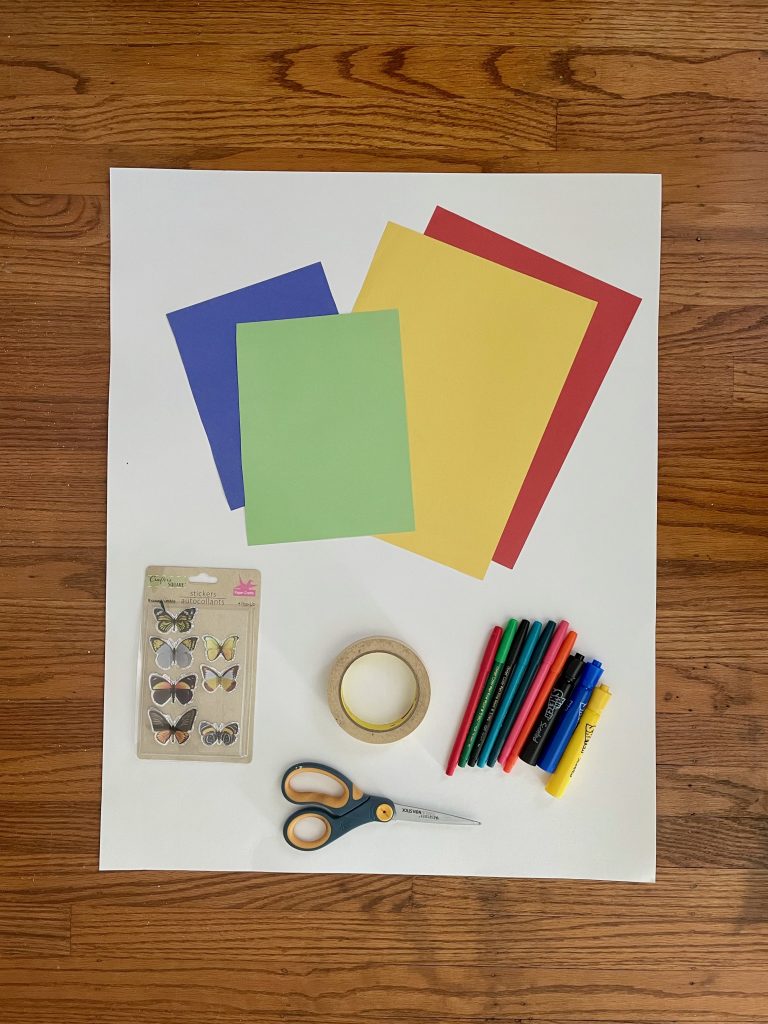
Materials
- Cardstock
- Child-safe scissors
- Liquid school glue (squeeze bottle or the kind you can pour into a cup)
- (Optional) Paintbrush(es)
- Table salt in a bowl (1 tbsp or more)
- Liquid watercolor paints or food coloring
- Pipettes (or medicine droppers)
- Art tray or rimmed baking sheet for working on top of
Setting Up & Making Cut-Out Hearts
- Keep the liquid school glue in its bottle, or pour about 2 tbsps of it into a cup and place a paintbrush into it (this might be easier for toddlers and children with limited hand strength).
- (Optional) Dilute liquid watercolor paints or food coloring with a few tbsps of water.
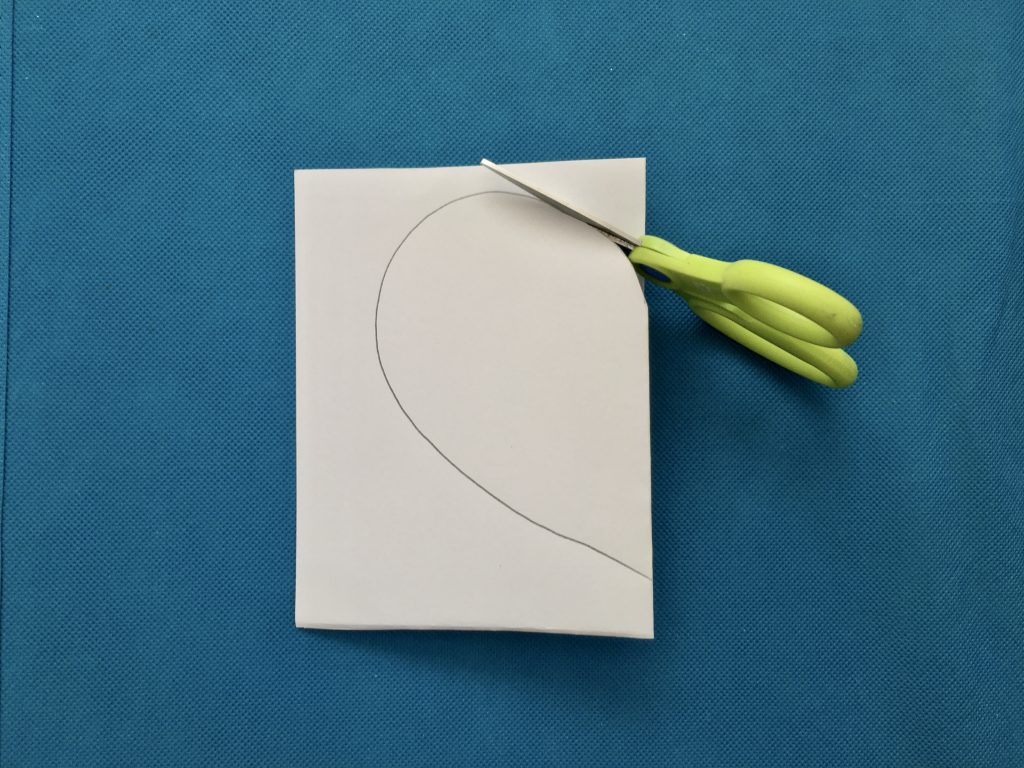
- Create a cut-out heart by folding a piece of cardstock in half vertically (“hamburger style folding”). Next, draw one half of the heart on the folded edge of the paper. While it’s still folded, cut out the half-heart. Unfold the paper to reveal an entire cut-out heart!
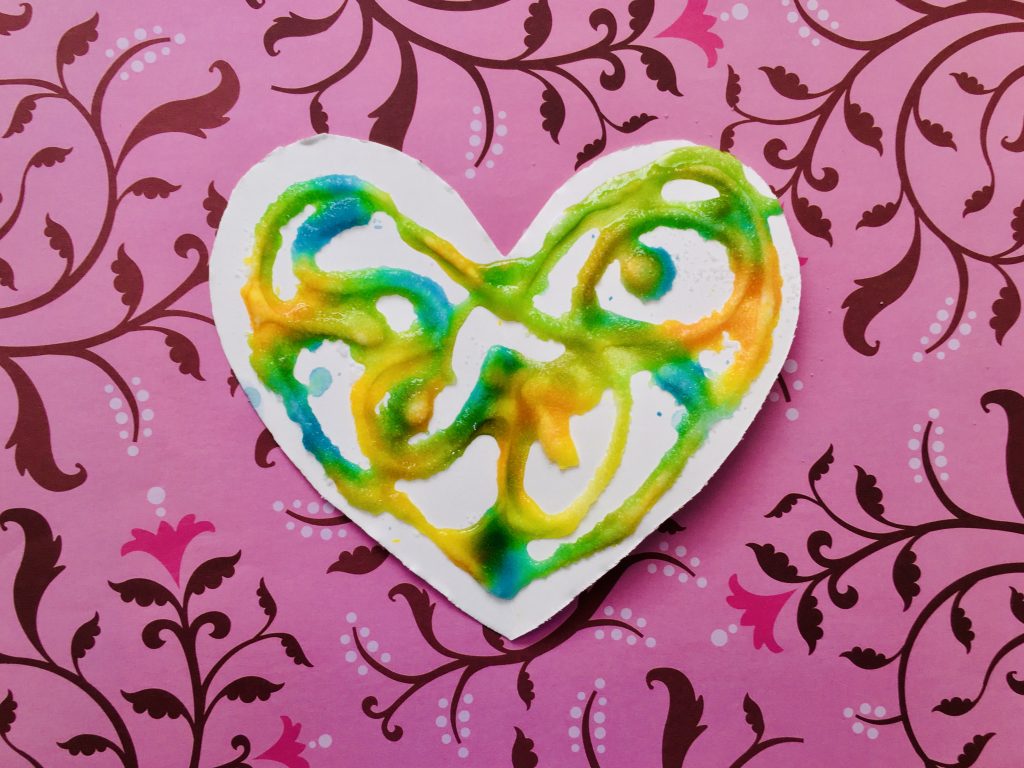
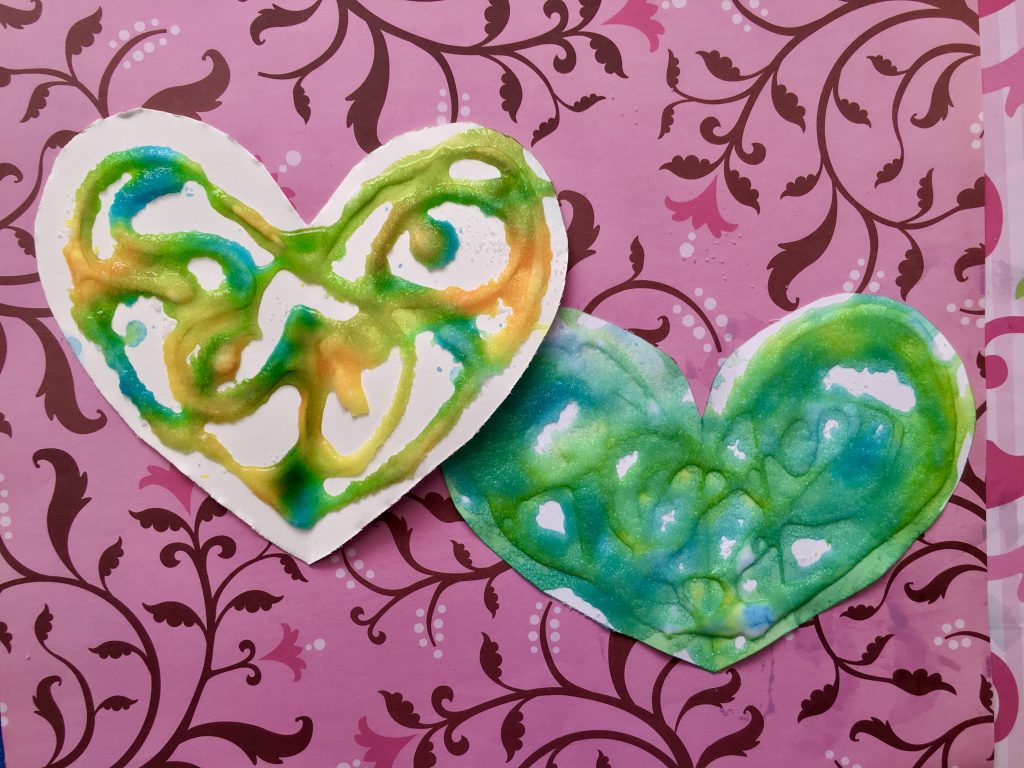
Making Salt & Glue Hearts
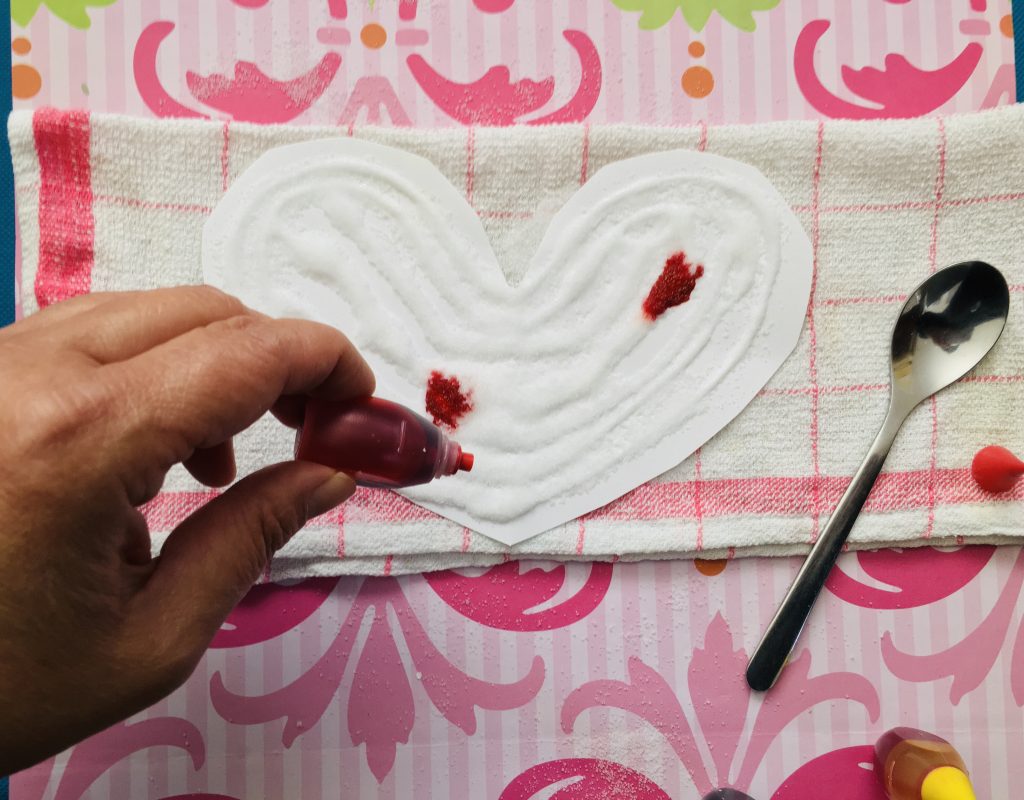
- Squeeze the glue onto the paper heart to create designs or doodles. Or, if you poured the glue into a cup, drip it from the paintbrush onto the paper heart (especially if squeezing a glue bottle is too difficult).
- Sprinkle a few pinches of salt over the glue design on the heart (shake off the excess salt into a bowl so you can reuse it).
- Using a pipette or a paintbrush, drip the watercolor paint or the food coloring onto the salt/glue mixture that’s on the heart. Ask, “What do you see when the color mixes with the salt? Do the drops of color stay in one spot, or do they spread out over the rest of the salt?” Move the paper heart around to change the direction of the spreading color droplets.
- Let the heart dry for a few hours (since humidity might cause the salt to oversaturate the paper). Once the artwork is dry, ask, “What do you see now? Do you see any change in the colors? What about the glue? Is it still sticky, or is it dry and hard? What else do you notice about the paint, the salt, or the glue?”
Alternatives
There are many ways to do this activity with the same materials, and experimenting can be a great learning experience! For example, try painting the paper heart first, then apply the glue designs on top. Then, when the salt is added, it affects both the wet paint and the glue. Ask, “What do you see when the salt hits the watercolor paint? What about when it hits the glue?” Encourage your child to start with the salt first to see how it’s different from when they start with either the glue or the watercolor paint.
More Information
Habitot’s Hearts Art Week overlaps with Valentine’s Day (February 14), a holiday named for a Christian saint who’s been celebrated since the 5th century. Valentine’s Day has evolved over 1,500 years – it’s become a celebration of the expression of warmth and the appreciation of others, as well as the appreciation of oneself. And although Valentine’s Day is not universally celebrated, in some elementary schools (in the US), children exchange small Valentine’s Day cards.
Here’s a quick history of the origins of Valentine’s Day.