
Disclaimer: This page contains Amazon affiliate links. If you make a purchase from one of the links, Habitot will earn a small commission at no extra cost to you.
A sunny day is a great opportunity to make art and try science experiments outdoors. Creating construction paper sun prints is a simple activity that lets your child observe the effects of sunlight on objects.
What We’re Learning & Skills We’re Building
- Solar science – studying the sun, its energy, and its effects on objects
- Chemical change – ultraviolet light from the sun causes some chemicals (like the dye in colored construction paper) to change in color
- Cause and effect – sunlight causes colored paper to lighten; adding objects to the paper shades parts of it from the sunlight causing prints to appear later
- Comparison – observing the difference between the paper’s color before being exposed to sunlight and after it’s been sitting in the sun for 2-3 hours
- Language acquisition – learning words and phrases such as “fade,” “emit,” and “ultraviolet light”
Materials
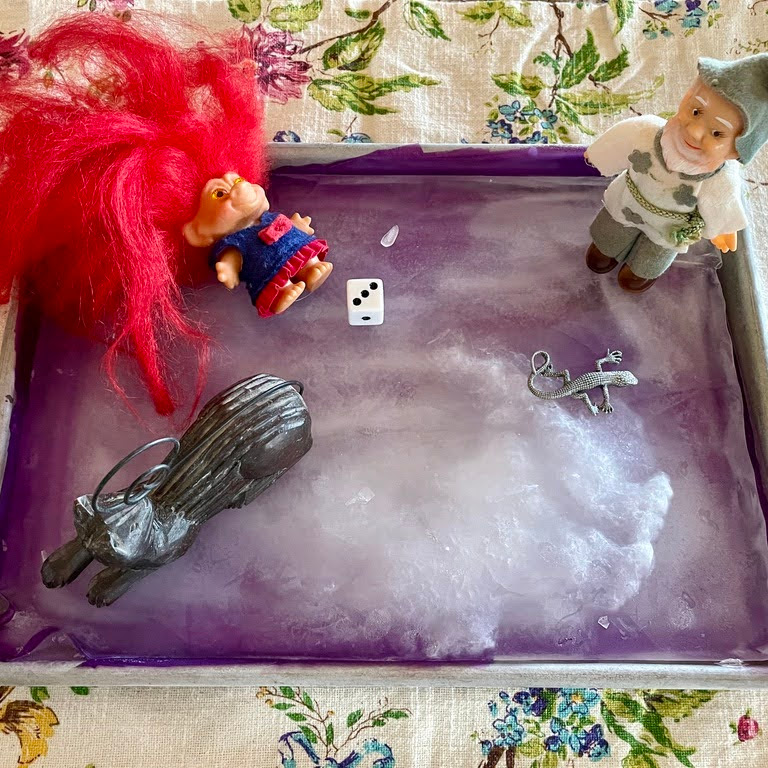
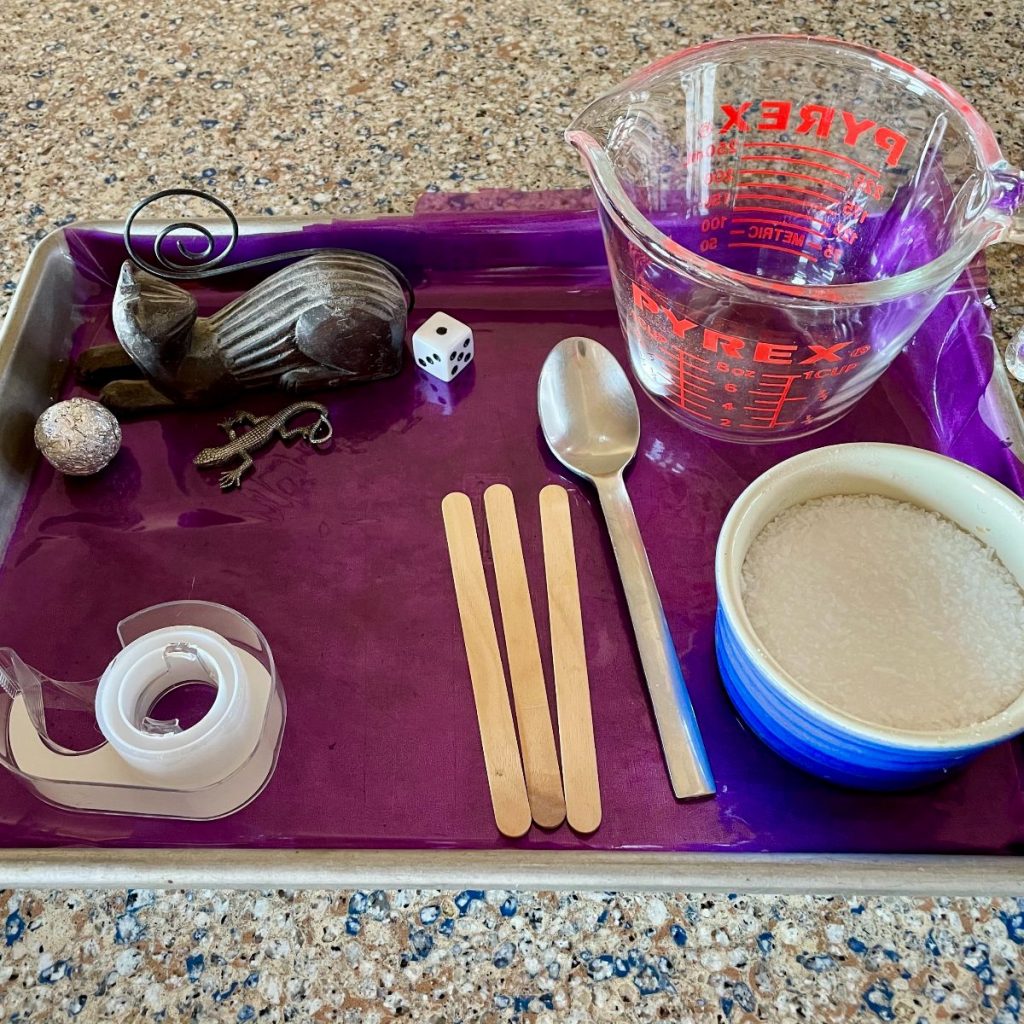
- Shallow art tray or baking tray with rimmed edges
- Plastic measuring cup with a spout or a small pitcher
- Small, lightweight toys and trinkets (plastic toys with flat bottoms work best)
Optional Materials
- Under-the-ice decorations: Cellophane, foam shapes, glitter, leaves, etc.
- Tape
- Kitchen towels or mitts
- Pipettes or medicine droppers
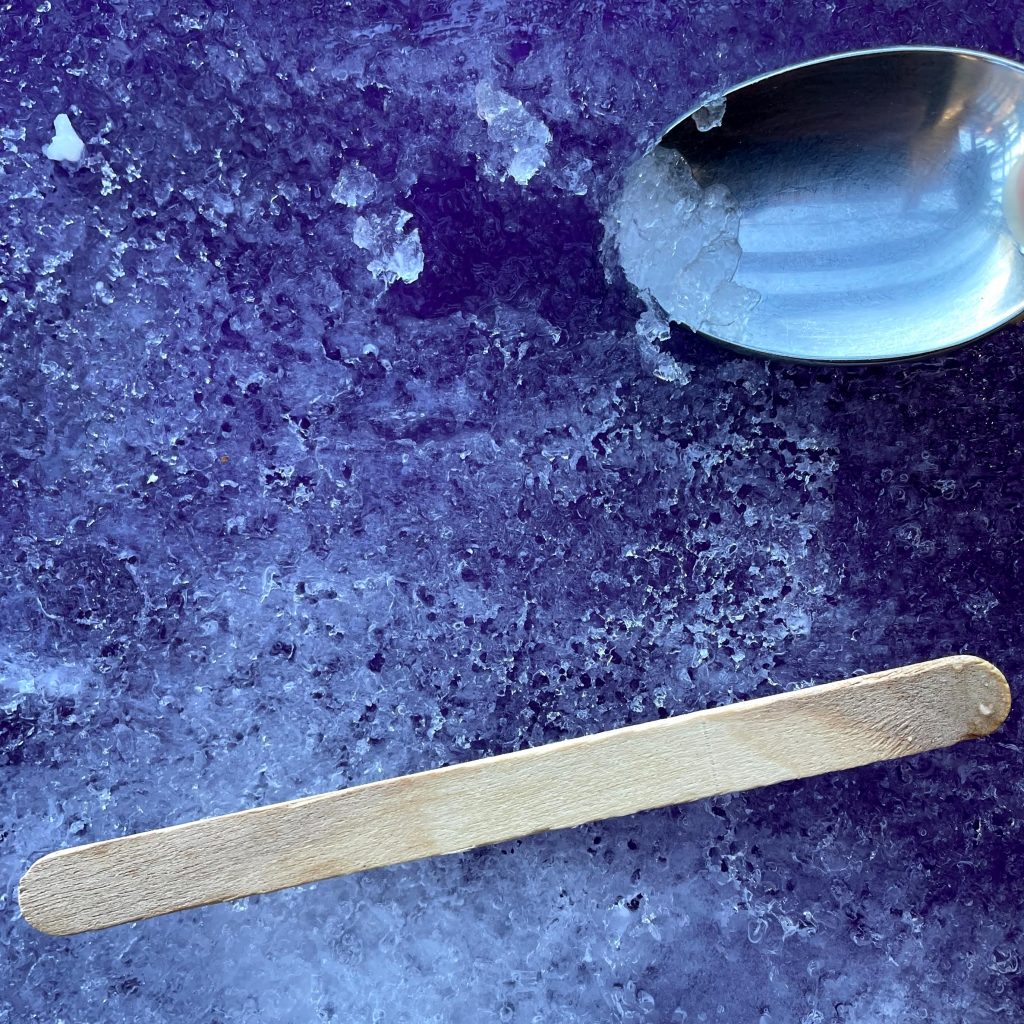
- Excavation tools: Spoons, craft sticks, paintbrushes, child-safe kitchen utensils, etc.
- Salt
Setting Up
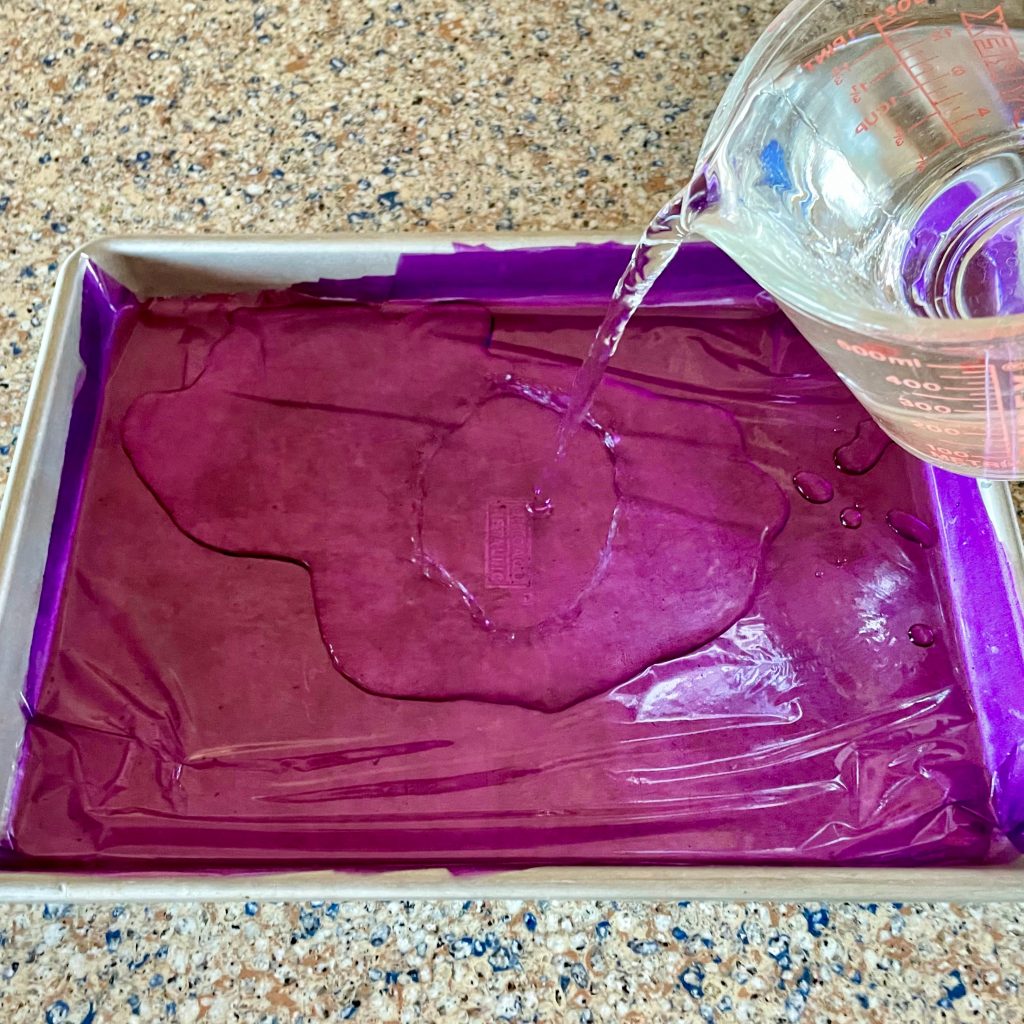
- (Optional) Add decorations to the inside bottom of the tray using tape, if needed.
- Fill a spouted measuring cup or a small pitcher with water. Then, pour the water into the tray until it’s about ¾ full.
- Carefully place the tray on a flat surface in the freezer and leave it until the water is completely frozen (it could take up to 24 hours).
- Check on the freezing process every few hours. Ask your child, “What do you see and feel? Is the water still slushy? Is it only hard in some spots?” Together, notice how the water might freeze unevenly – water expands as it freezes. Use vocabulary words to describe the water such as “liquid,” “wet,” “slushy,” “cool,” “cold,” “frozen,” “icy,” “hard,” and “slippery.”
- When the water is completely frozen, remove the tray from the freezer (consider using towels or mitts to hold it – it’ll be very, very cold!). Place the tray on a flat surface that you don’t mind getting wet.
Observe, Play, & Experiment
- Your child can explore the ice with their hands, or they can even feel it with their toes! Ask them to describe the feeling of the ice using the words introduced earlier (see #4 of Setting Up above).
- If the ice feels dry and sticky at first, run a wet sponge over it, or pour a few spoonfuls of warm water over it to make the ice more smooth.
- Push the toys and trinkets around on the ice to act as ice skaters!
- See how far each toy/trinket travels on the ice when giving it a little push. When doing this, your child is experiencing the concept of friction: the smooth, frozen water reduces friction, so objects slide more easily than they do on rough, dry surfaces.
- Compare the effects of pushing the toys and trinkets on the ice to pushing them on an empty baking tray, a table, or the floor/carpet. Ask, “Which surface do they go fastest on? Which surface do they go farthest on?”
- Ask, “Can you think of any ways to get your toys and trinkets to skate across the ice without touching them with your hands? What safe tools can we use to push them? Do some of them skate (move) on their own without any pushes? Will blowing on them get them to move?”
- Use pipettes and medicine droppers to drip water of different temperatures over the ice to see which melts the ice the quickest.
- Your child can pretend to be an excavator or archaeologist by cracking, melting, and digging in the ice using spoons, popsicle sticks, child-safe kitchen utensils, and paintbrushes!
- Try sprinkling and/or rubbing salt over the ice. Ask, “What’s happening?”