
Disclaimer: This page contains affiliate links. If you purchase a material from one of the links, Habitot will receive a small commission at no extra cost to you.

Collect natural materials and weave them together with colorful yarn – perfect for early fall! In honor of Indigenous Peoples Day (Monday, Oct. 10, 2022), this activity is inspired by the Ohlone Indians of Northern California, known for weaving intricate tulle baskets, rafts, and shelters.
Want to see some contemporary Ohlone basket making? Here’s a video of the Ohlone Basket Weaver, Linda Yamane, keeping a cultural tradition alive.
What We’re Learning & Skills We’re Building
- Measurement – using a yardstick, a measuring tape, or a ruler to figure out how long the yarn needs to be
- Fine motor skills – using the small muscles in the hands to hold, twist, and tie yarn
- Cultural & historical appreciation – learning about baskets woven by Ohlone people
- Nature exploration – finding and using natural materials in art
(Note: Don’t pick twigs, flowers, or leaves directly from trees or plants! Please ask for permission to collect from private property [that’s not your own] and remember: no collecting is permitted in regional parks. Here’s a list of endangered plants in CA that may not be collected.)
Mud Cakes
Materials
- Trowel, plastic kid’s shovel, or large spoon
- Firm mud (straight from the ground or a mix of dirt and water)
- Small- or medium-size plastic flower pot or large yogurt container
- Sticks from outside, spoons, or craft sticks for mixing mud
- A sunny spot outside
Optional & Suggested Materials
- Cake or pie tin (if you’re comfortable using materials from your kitchen)
- Egg cartons, peat pots, or small plastic yogurt/other containers
- Decorations: leaves, flowers, grass, rocks, sticks, safe toys
- Recyclable goods (plastic takeout bowls, berry containers, cardboard, etc) to act as plates or serving dishes. Or, washable plates and cutlery.
- Cardboard box, shoe box, or milk crate for pretend oven
(NOTE ABOUT MUD: Not all dirt can easily be turned into mud. Heavier clay soil, not potting soil or typical garden soil, will work best. Dirt under grass (yard or wild) is usually a good bet. Any uncultivated soil, like the strip of land between the sidewalk and the street, should work.)
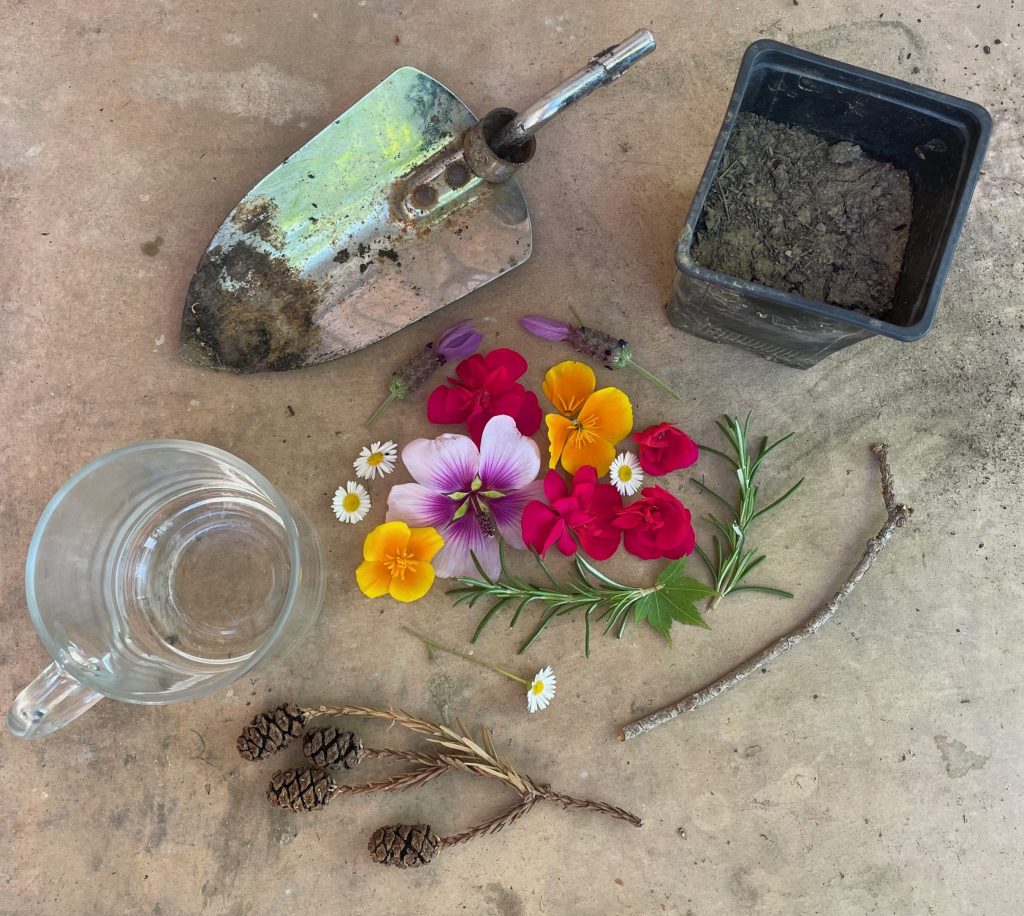
Colorful Flower “Tea”

Directions
- Use a trowel, a plastic shovel, or a large spoon to dig up some fresh, firm mud. Fill a container, such as a plastic flower pot or a clean yogurt container, about ¾ with mud.
- (Alternative) Scoop dry dirt into a plastic pot or other container. Mix in water with a stick or a spoon to create firm mud (the amount of water will depend on the size of the container). Add more water if it’s too dry, more dirt if it’s too runny.
- Place the “cake” in a sunny spot outside to dry into a firm solid. Or, “bake” the cake in an “oven” also placed in a sunny outdoor spot. (Note: Cakes don’t need to be completely dry (hard/crumbly), and drying times will vary depending on the size of the cake and the weather. Some very thick clay soils may take a full day or longer depending on the container size.)
- After the cake has baked, or at least dried into a more solid form, flip the container onto a plate, a flat piece of cardboard, or another flat surface. Gently shake the container so the cake slips out. Use a trowel, a spoon, or a stick if the mud cake is stuck to the sides of the container.
- Decorate the cake! (We used flowers and other natural materials, then added redwood cone “candles.”) Use other small toys or safe decorations from your home.
Muffins, Cupcakes, and Other Foods
Create smaller desserts and more pretend food with mud and natural materials – perfect for sharing! Swap out the plastic flower pot or the large yogurt container for an egg carton, an old muffin tin, small cups, or paper muffin liners. Follow steps 1-5 above, or add your own “ingredients” and special twists.
Materials
- Drinking cups or teacups
- Water
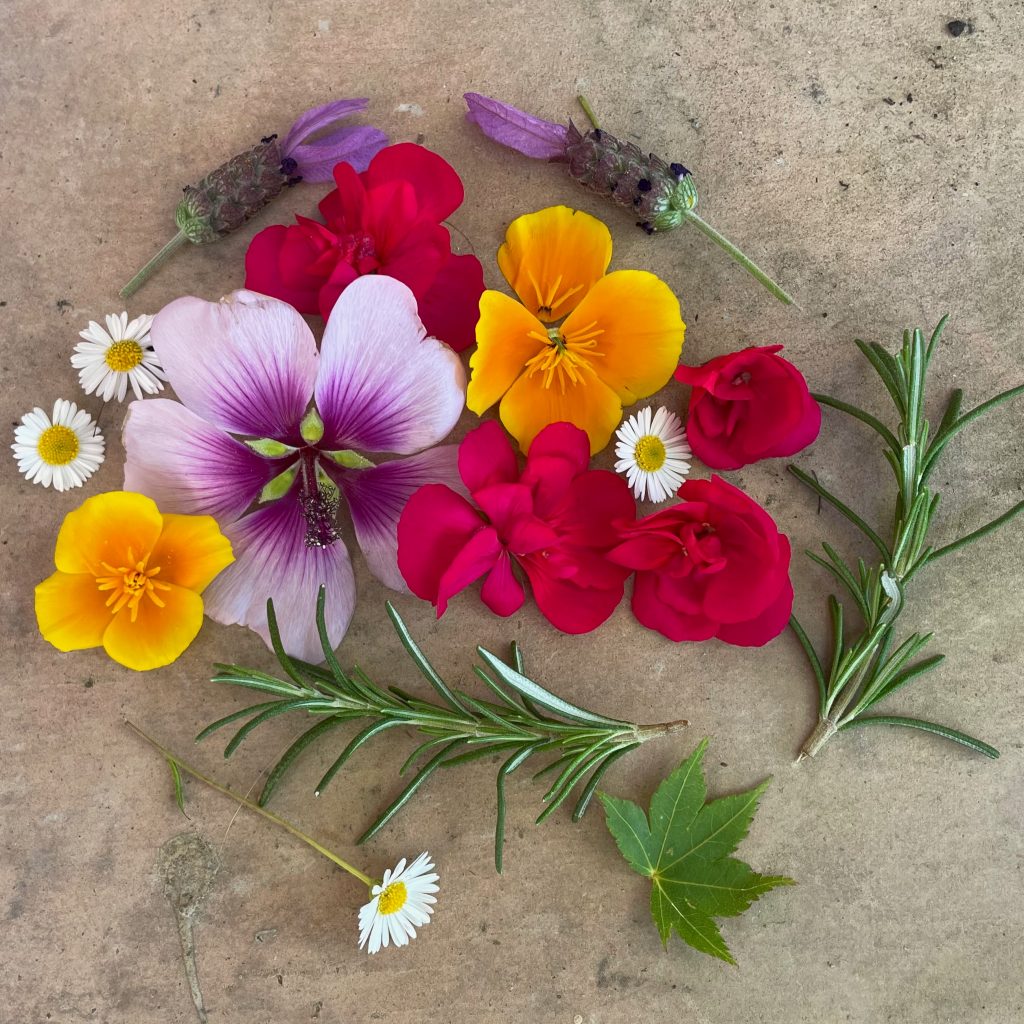
- Flowers, leaves, other plants
- Stick, long stone, spoon, fork for breaking up flowers
- Tea kettle or watering can (optional)
- Rolling pin for flattening flowers (optional)
(SAFETY: With children under 3, you can omit the water (so it’s not consumed) and just fill cups with flowers and leaves. Young children can still practice breaking up the flowers with a stick, a long stone, or a spoon.)
Directions
- Collect flowers, leaves, and other plants. Please review the “Collecting Plants” section above. Pluck the petals off, or use the entire flower.
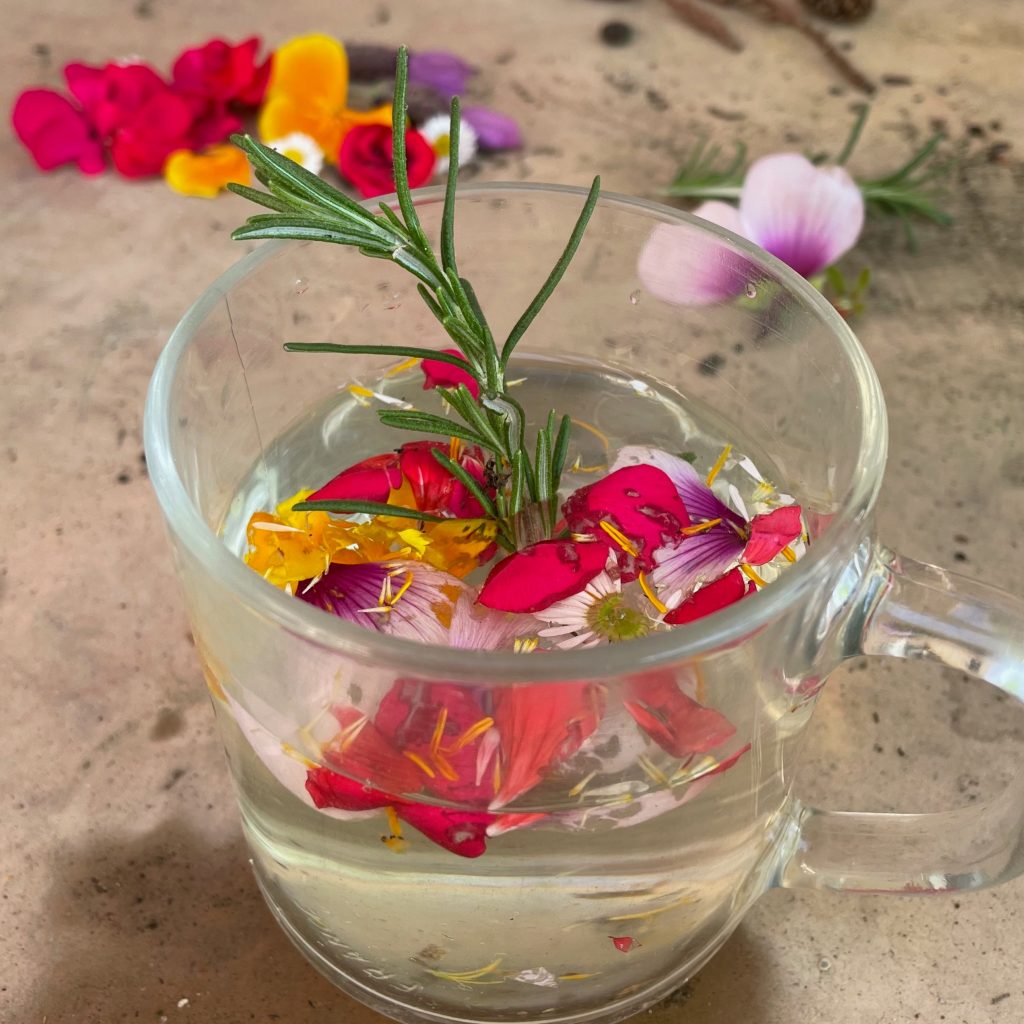
- Add flowers and plants into the cup. Break the flowers up with a stick, a stone, or a spoon. Add a teaspoon of water if the plants are difficult to break apart. (Or, skip breaking up the plants altogether.)
- Pour water into the cup so it’s about ¾ full. Observe as the water slowly changes in color from the plant mush. (Ours turned light yellow.)
- Have a tea party outside together with family, friends (at a safe distance), pets, and/or stuffed animals and serve some of your other dessert creations!
Other pretend foods you can make from nature
- Chocolate covered marshmallows (stones covered in mud)
- Soup (water mixed together with safe, natural materials)
- Leaf kabobs (a stick pierced through several leaves, cooked in the sun)
- Stuffed seashells (shells stuffed with sand)