Grocery Bag Art Book

title_bt_line
 

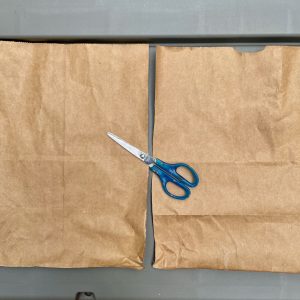
In this activity, you and your child will turn a brown paper grocery bag into a colorful, portable book for creativity and learning! Your child can practice motor skills like folding, cutting, and hole punching while creating a book to be filled with collected materials and homemade art. Assembling the book is probably easiest for adults and children ages 5 and up, while younger children, ages 1.5 and up, can help with decorating the book. 

What we’re learning & skills we’re building

  • Creative reuse – reusing materials to create art instead of throwing them away 
  • Fine motor skills – using the small muscles in the hands to fold paper, cut with scissors, and use a hole punch 
  • Measurement – using a ruler to measure where a hole needs to be made in the paper 
  • Sorting – collecting and arranging colored materials systematically in the book
  • Collaboration – working together to create and decorate the art book
 

Materials

  • 1 large brown paper grocery bag
  • Child-safe scissors
  • Pencil
  • Hole punch 
  • 2 short pieces of yarn or thin rope (about 6 inches each)
  • Decorative materials (ex: magazine pages, fabric scraps, flower petals, used gift wrapping paper, the net from produce bags, leftover construction paper, cereal box, ribbons, family photos, etc.)
  • Glue (either school glue or a glue stick) 
  • (Optional) Ruler for measuring where to punch the holes


Making the Art Book

  1. Cut out the front and back of a brown paper bag to make two big sheets of paper. (Try to make the sheets similar in size.) Cut the handles off of the bag, if it has them.  
  2. Fold one of the brown paper sheets in half, then fold it in half again. Once unfolded, there should be four rectangles on the sheet. 
  3. Cut out the four pieces using the fold marks as your guide to create the book’s pages.
  4. Repeat the same folding and cutting processes for the remaining brown paper sheet. (There should now be eight, small brown pages.)
  5. On one of the pages, punch a hole about 1” from the top, and then another hole about 1” from the bottom. The holes should be about a ½” in from the long edge of the page. This will create a template for where to punch the holes on the rest of the pages. 
  6. Place this template on top of each of the remaining pages, then use a pencil to mark where the holes should be punched. Punch the holes on the remaining pages.
  7. Stack all the pages together so the holes are aligned. Loop the yarn or string through the holes, then make a knot to tie your pages together.
  8. Voila! You have your art book ready to be used.
 

Ideas for Decorating the Art Book

  • We made a book themed on colors using mainly paper collage materials, but you and your child can fill the pages of your book differently using natural materials, stickers, stamps, family photos, making chalk scribbles, and more! 
  • We tore our materials into 1″-3″ pieces (excluding the yellow sheet of mesh) and used school glue to attach them to the page. If you use school glue, allow it to dry before decorating the next page.  
  • Each page of your book can be different, or the entire book can follow a theme, such as colors, plants, animals, family, etc. 
  • Share the book with friends and family and have each person decorate their own page to create a collaborative art book.