
(Disclaimer: This page contains affiliate links. If you make a purchase from one of the links, Habitot will earn a small commission at no extra cost to you.)
Creating a paper mache bowl is a simple way to make something special from materials that might otherwise be thrown away. Your child will learn the fun benefits of creative reuse, practice their fine motor skills, and observe physical changes in the materials.
What We’re Learning and Skills We’re Building
- Creative reuse – reusing materials that might otherwise be thrown away to create something new
- Fine motor skills – using the small muscles in the hands to pick up small strips of paper and press them onto the bowl
- Physical change – dry flour changes into a sticky, liquid paste when mixed with water
- Cause & effect – the paste causes the paper strips to stick together, and the air causes the paste-covered paper to dry into a solid form
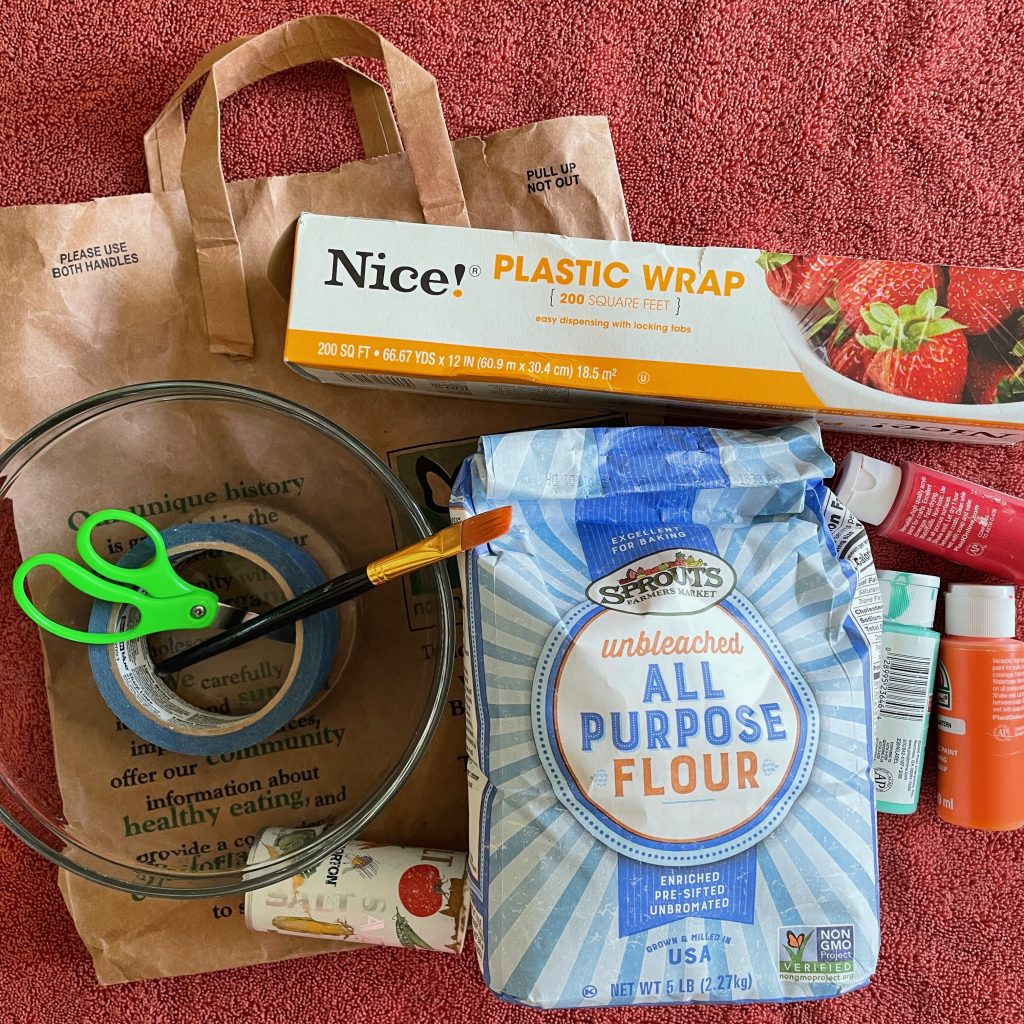
Materials
- Small to medium-size bowl
- Plastic wrap and tape
- Paper bags, newspaper, or magazine pages cut into strips (alternatives: packing paper, tissue paper, or construction paper)
- 1 cup of flour, 1-2 tsps of salt, and 1 ½ cups of water mixed together (salt helps prevent mold growth)
- Art tray, baking pan, or large piece of cardboard to work on top of
- Child-safe scissors
Optional Materials
- Paintbrushes
- Non-toxic washable tempera paint
- Craft varnish (Mod Podge) or clear-drying liquid school glue
- Stickers, pom poms, and other lightweight decorations
Prepping the Materials
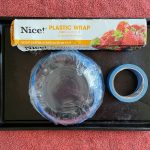
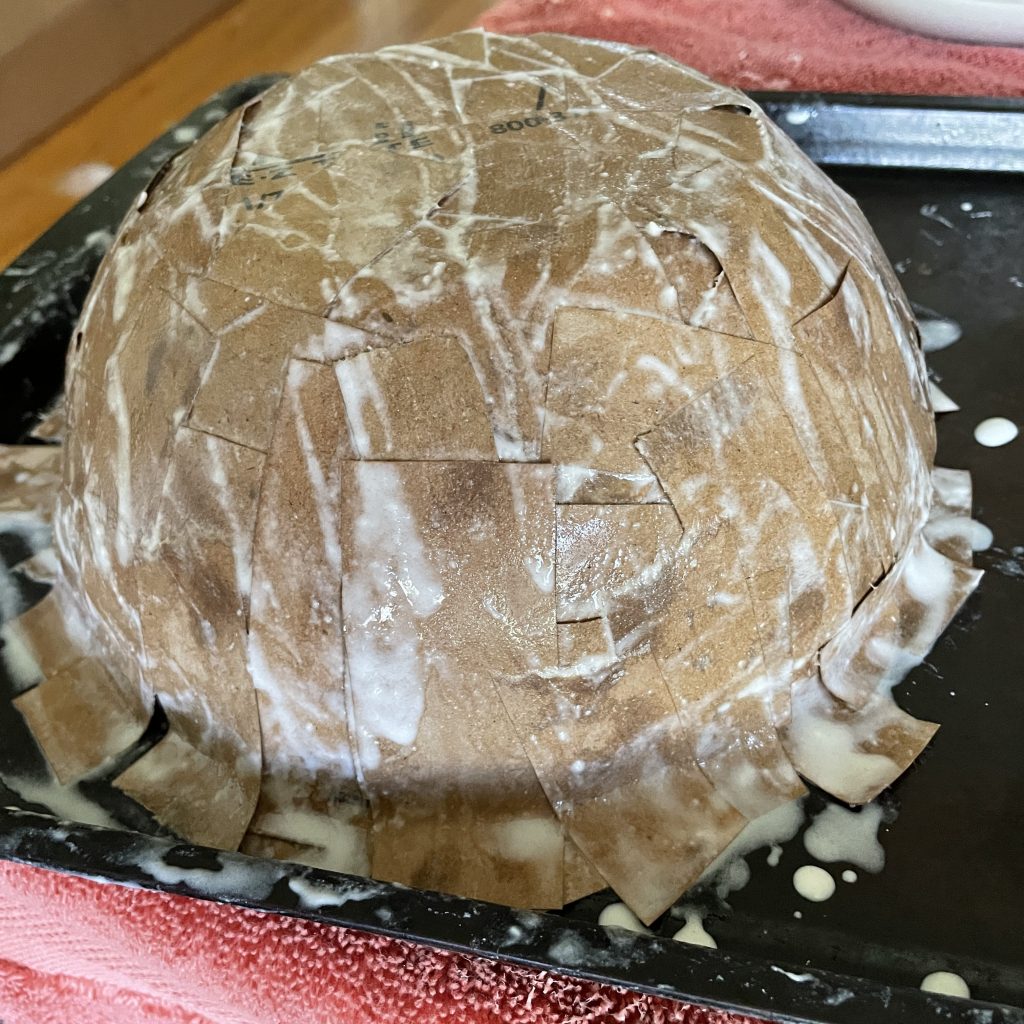
- Flip the bowl over and cover the outside with plastic wrap (this will help with peeling off the paper mache once it’s dry). Use tape to secure it to the inner part of the bowl.
- Cut or rip 2”-4” long strips (about 1” wide) from a paper bag, a newspaper, or a magazine.
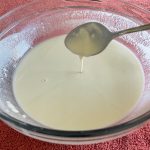
- Make the paste in a separate bowl by mixing together 1 cup of flour, 1-2 tsps of salt, and 1 ½ cups of water. It should be the consistency of thin pancake batter (add more water if it’s too thick or more flour if it’s too thin).

Paper Macheing the Bowl
- Place the plastic-covered bowl onto an art tray, a baking pan, or a large piece of cardboard. This next part is messy, so have towels ready for the drippy paste!
- Dip a strip of paper fully into the paste. Run it between your fingers to remove the excess.
- Starting at the top of the upside-down bowl, lay the strip down and flatten it into place.
- Repeat steps 2 & 3, pressing the wet strips down in a criss-cross style until the bowl is evenly covered. Extend the strips past the outer rim of the bowl by 1″-2″ (you’ll trim these once everything’s dry).
- Set the bowl near a window or a fan and let it dry overnight, or for a full 24 hours.
- (Optional) If the paper mache is flimsy once it’s dry, add 1-2 more layers of paper strips, letting each layer dry before adding another. (Note: A covered bowl of paste can be kept in the fridge for 2-3 days.)
- When the paper mache is completely dry, carefully peel it from the bowl. (Note: Adults, this is easiest if you use a butter knife or other safe utensil to scrape underneath the plastic wrap.)
- Flip the paper mache bowl over and use child-safe scissors to cut off the excess paper from the rim, evening it out. Voilà!
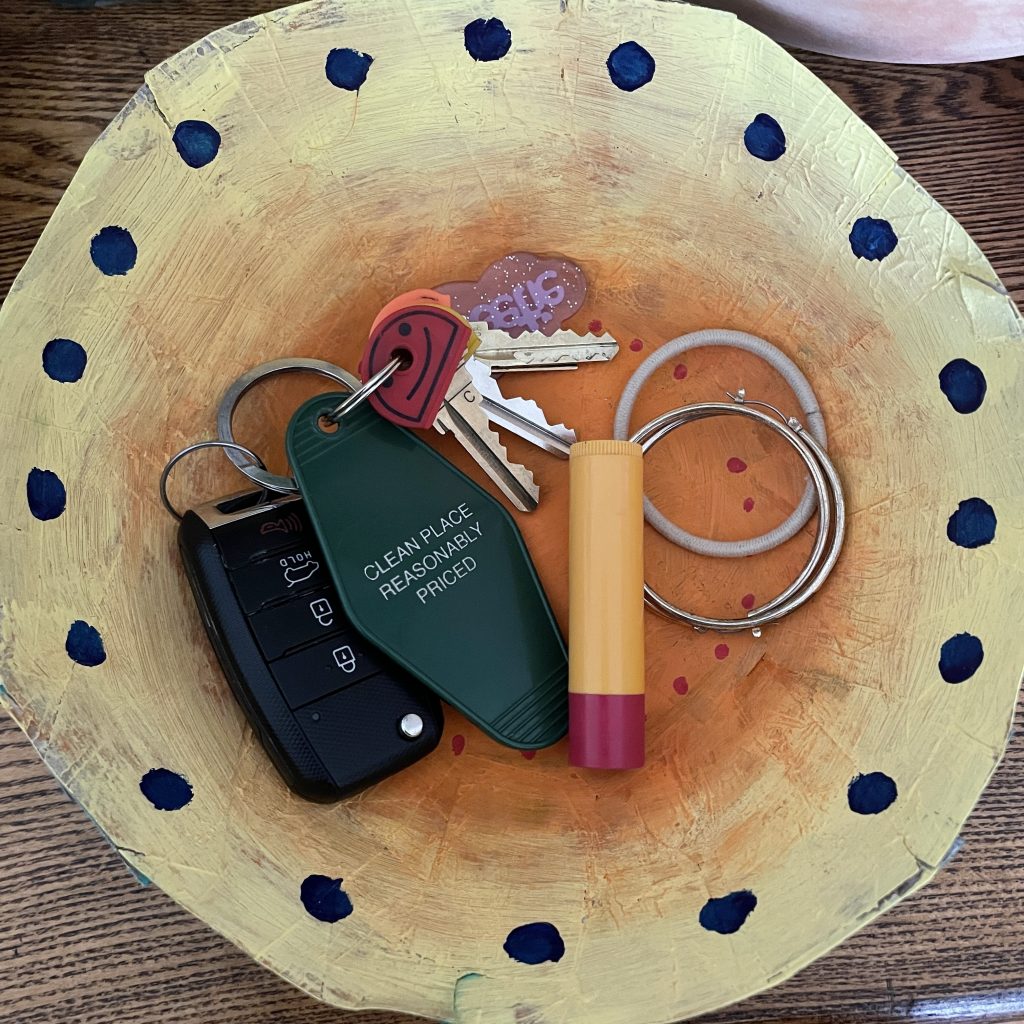
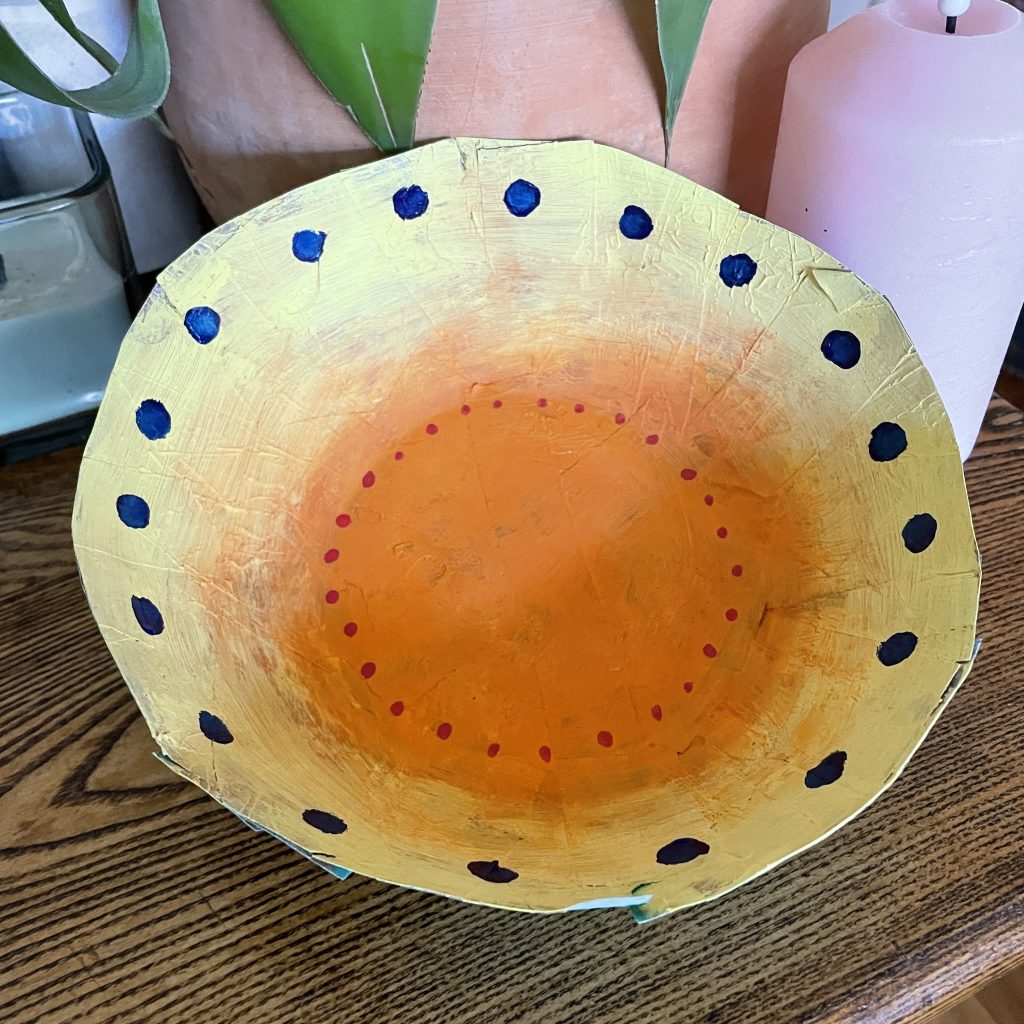
Decorating & Using the Bowl
Have fun decorating your paper mache bowl with tempera paint or lightweight craft materials such as stickers or pom poms. Try not to over-saturate the bowl with paint as it might become flimsy again. A layer of clear-drying liquid school glue or craft varnish (Mod Podge) will harden the paper mache and seal the paint.
Paper mache isn’t super strong, so it’ll work best best as a decorative bowl for holding small lightweight objects like keys and loose change. We don’t recommend using it to hold fruit, other foods, or plants since moisture from these things can cause the paper to become soggy and rip.