
(Disclaimer: This page contains affiliate links. If you make purchase from one of the links, Habitot will receive a small commission at no extra cost to you.)
Ice melting activities have been most popular in our camps and in the Art Studio. In this Make a Glacier activity, your child can explore changes in the states of water: it freezes in cold temperatures and melts in warm temperatures. This activity also gives you the opportunity to talk with your child about the earth’s melting glaciers and climate change.
What We’re Learning and Skills We’re Building
- Changes in the states of matter – water can change from a liquid state to a solid state, then back to liquid again when exposed to different temperatures and pressures
- Sensory awareness – water when frozen as ice is colder than water as a liquid
- Experimentation – testing out different ways to melt ice
- Observation – noticing what happens when water and salt are dripped/spread over ice
- Climate change – thinking/learning about what’s causing glaciers and ice caps to melt
Materials
- Produce bag or large Ziploc bag (without holes!)
- Ice cubes
- Water in a pitcher or a bowl (enough so the above-mentioned bag will be ¾ full)
- Liquid watercolor paints or food coloring
- Art tray, plate, or baking sheet
- Small bowls or cups of water
- Pipette/medicine dropper, paintbrush, and/or spoon
Optional Materials
- Discovery items: plastic figurines, rocks, etc.
- Bowl or any freezer-safe container (that fits in the freezer)
- Salt and spoon
- Toy hammer, plastic cutlery, craft sticks, or other safe tools for breaking the ice apart
Making the Glacier
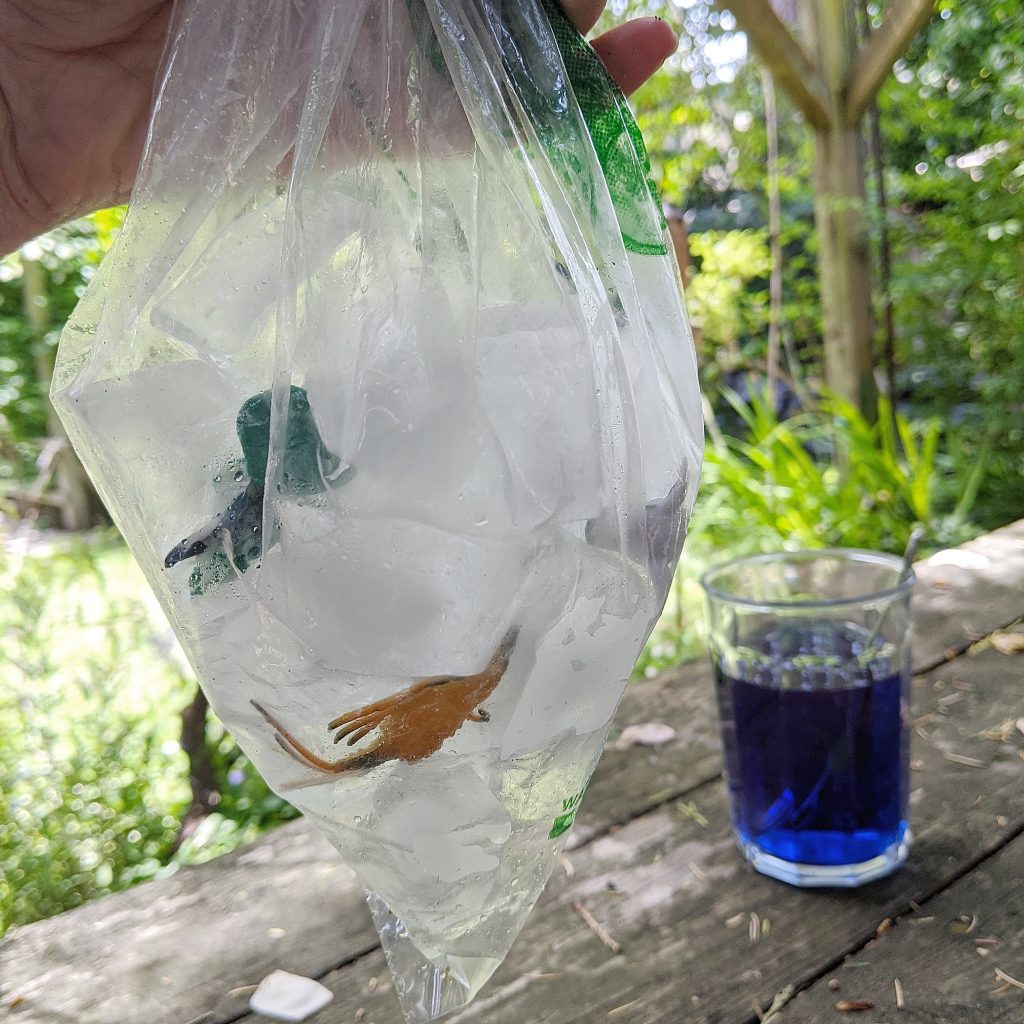
- Fill a produce bag or a Ziploc bag halfway with ice.
- (Optional) Place discovery items (see Optional Materials above) into the ice in the bag.
- In a pitcher or a bowl, mix water (enough to fill the bag ¾ full) with a few drops of liquid watercolor or food coloring. Carefully pour the water and color mixture into the bag with the ice.
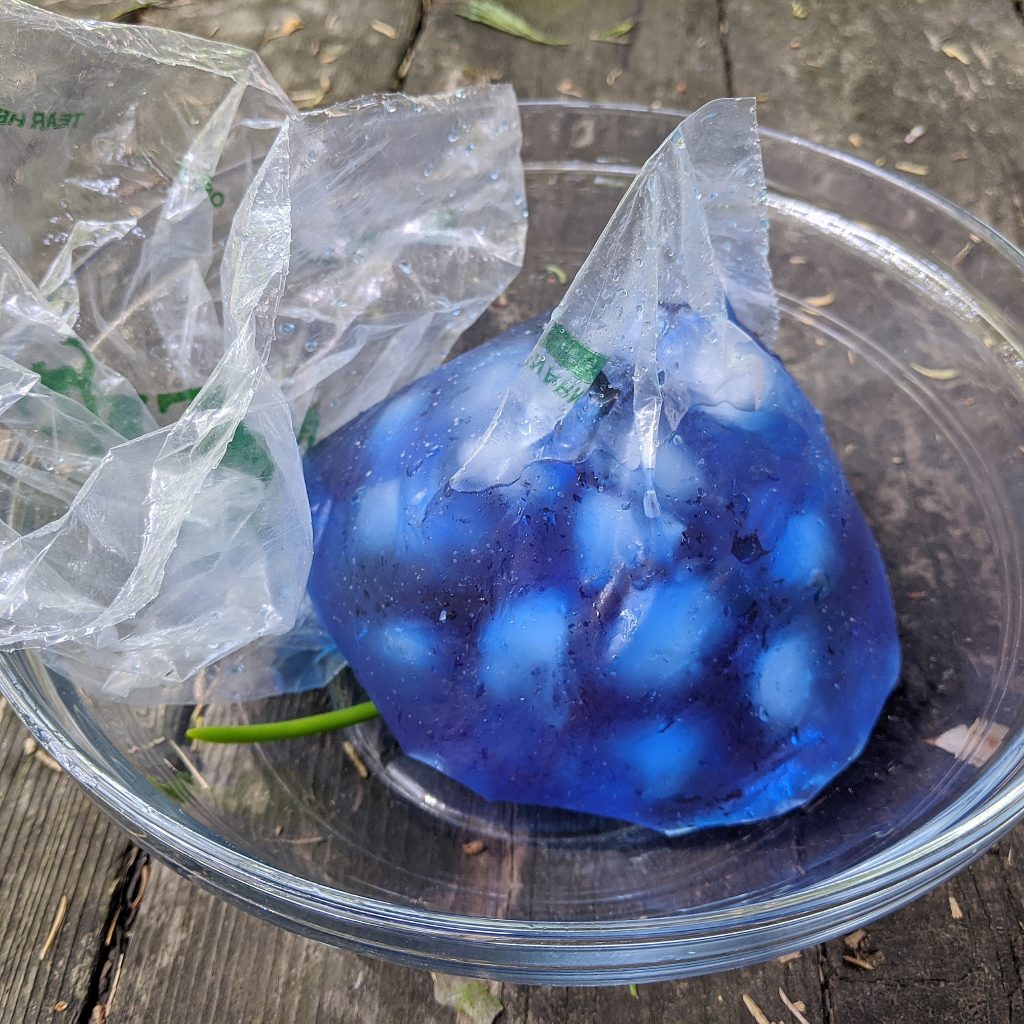
- Tie or seal the bag shut leaving a little space for the water to expand as it turns into ice. (You might want to put the bag in a large bowl or a freezer-safe container so there’s no risk of spillage). Place it in the freezer and leave it there for 24 hours.
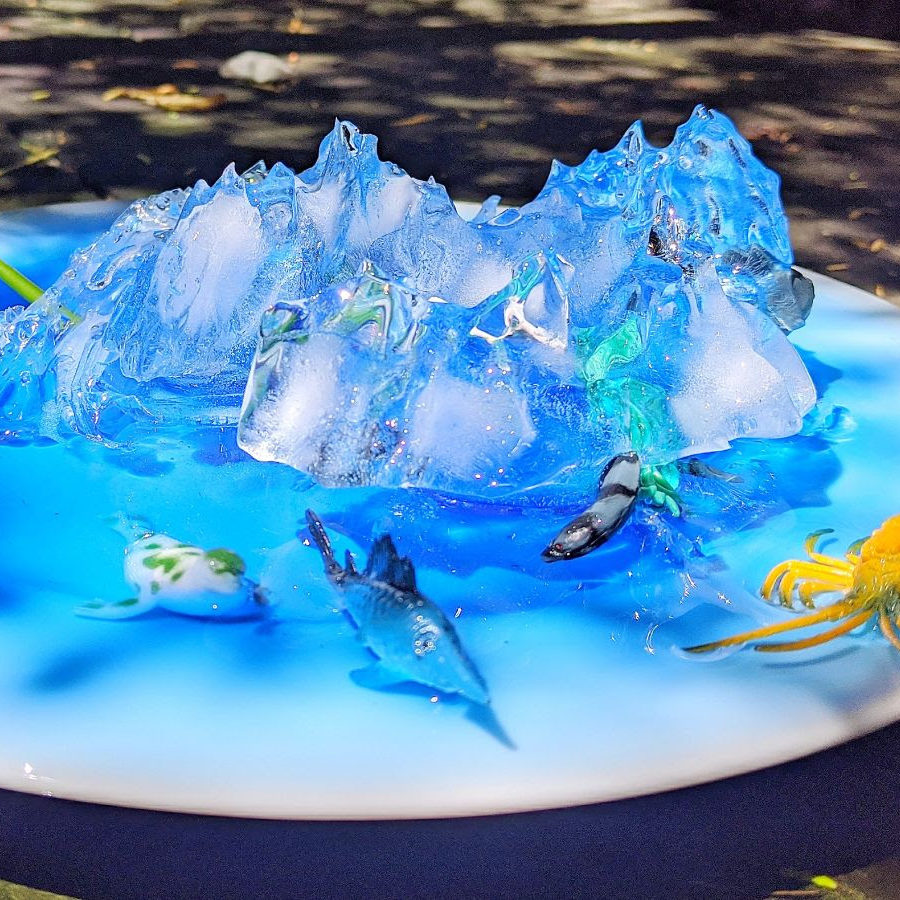
- When the water is frozen solid, take the bag out of the freezer and let it sit for a few minutes on a tray. Then, peel off the plastic bag from the clump of ice.
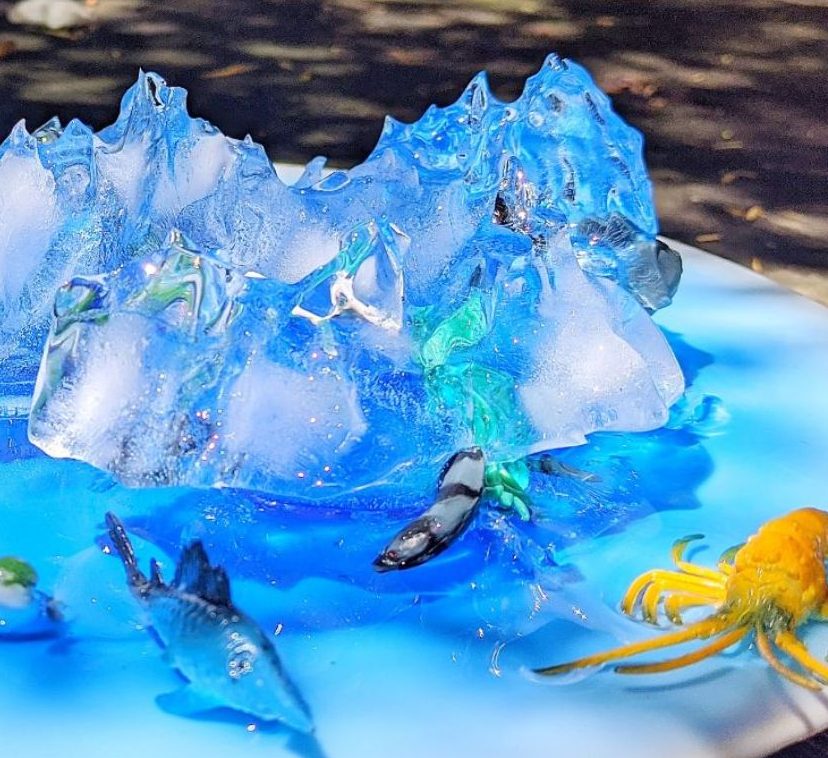
Let Your Child Discover
Put the mini-glacier on a tray and let your child experiment by melting it in different ways:
- Fill up a few small bowls or cups with water. Fill some of them with warm water and others with cold water. (Optional) Put a few drops of liquid watercolor or food coloring into each bowl/cup.
- Use a dropper, a paint brush, or a spoon to drip water onto the glacier. Ask, “Is the warm water affecting the ice differently from the cold water? How so?”
- Observe the colorful patterns the watercolor or the food coloring created on the surface of the ice (if you added color).
- (Optional) Use a spoon to sprinkle salt onto the ice. Ask, “What do you see happening to the ice?”
- If you or your child placed any discovery items into the ice, note how long it takes to find them just by squeezing water and/or sprinkling salt over the top.
- Use toy hammers, plastic toy cutlery, craft sticks, or other safe tools to break apart the ice and dig around for discovery items.
- Place the “glacier” in the sun. Observe with your child for a few minutes (or longer), then ask, “What do you see happening to the ice? Why do you think that’s happening?”
- When your child has questions, encourage them further, saying, “That’s a good question. Let’s find out!”
More Learning
This colorful “glacier melting” project can start kids thinking about the properties of matter. Water is a good example of something that changes from solid (ice) to liquid (water) to gas (clouds) in our everyday lives. You can also use this activity to talk about temperature – warming something up is what changes it from a solid to a liquid. Older children who are learning about climate change and the melting ice caps can read about things that are being discovered under the ice. Did you know that receding glaciers are exposing the bones of wooly mammoths and other ancient animals?