
Disclaimer: This page contains affiliate links. If you make a purchase from one of the links, Habitot may earn a small commission at no extra cost to you.
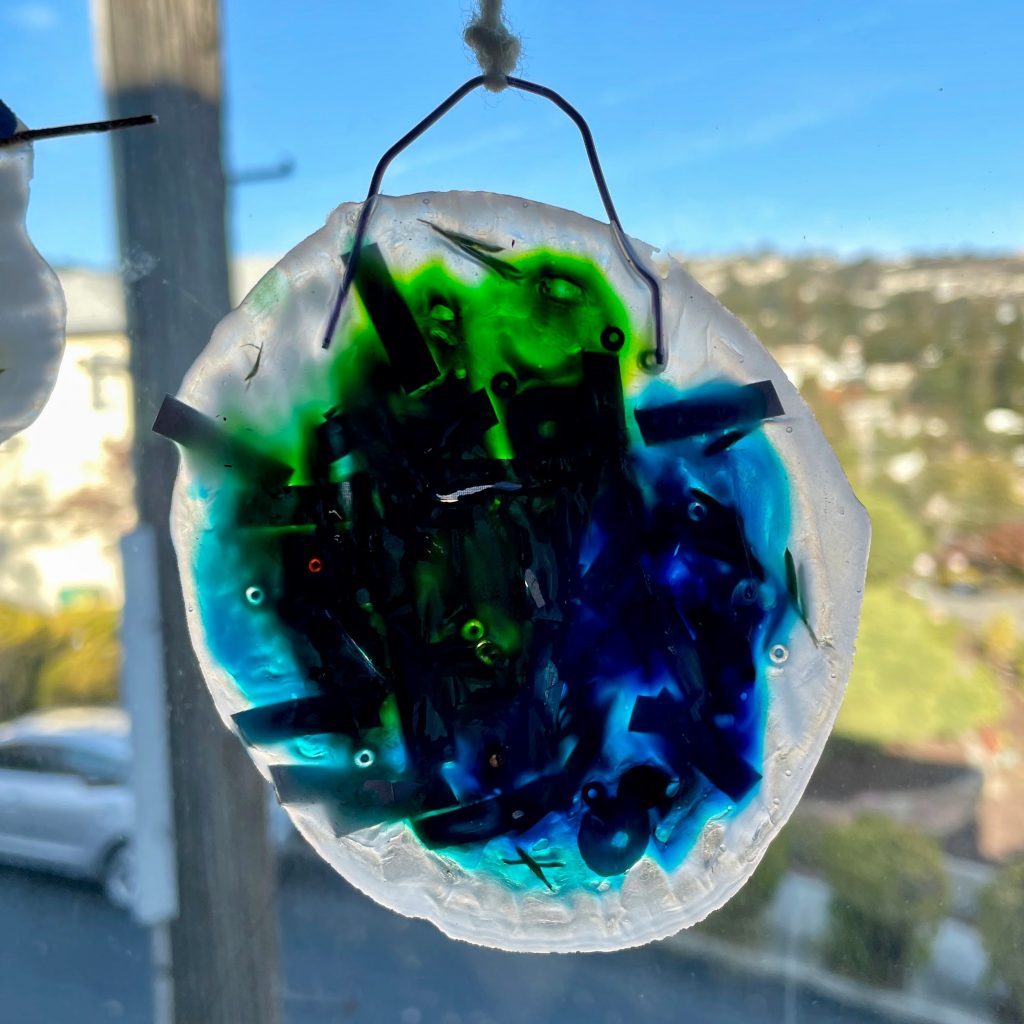
Catch warm rays of sunshine through the cold window with translucent, colorful light catchers. While creating unique wintertime decorations, your child will practice fine motor skills and observe how a liquid (glue) turns into a solid as it dries.
What We’re Learning & Skills We’re Building
- Physical changes in matter – liquid glue hardens into a solid as the air dries it
- Creativity – using your imagination to create something artistic from glue
- Fine motor skills – using the small muscles in the hands and arms to squeeze glue from a bottle
- STEM vocabulary – learning what the words “translucent” and “transparent” mean

Materials
- Thin sheet of wax paper (or plastic transparent sheet, ziploc bag, etc.)
- Art tray or baking pan
- White or clear liquid school glue in a squeeze bottle
- Food coloring or liquid watercolor paints
- Craft stick, paintbrush, chopsticks, or spoon for mixing
- Decorations: Cut-up construction paper, biodegradable glitter, sequins, googly eyes, twigs and other natural materials, or buttons, ribbon, etc.
- Large paper clips
- String or yarn for hanging
- Optional Materials
- Stencils and cutouts
- Pencil or permanent marker
- Small bowl for glue
- Small, lightweight rubber band
Making the Light Catchers
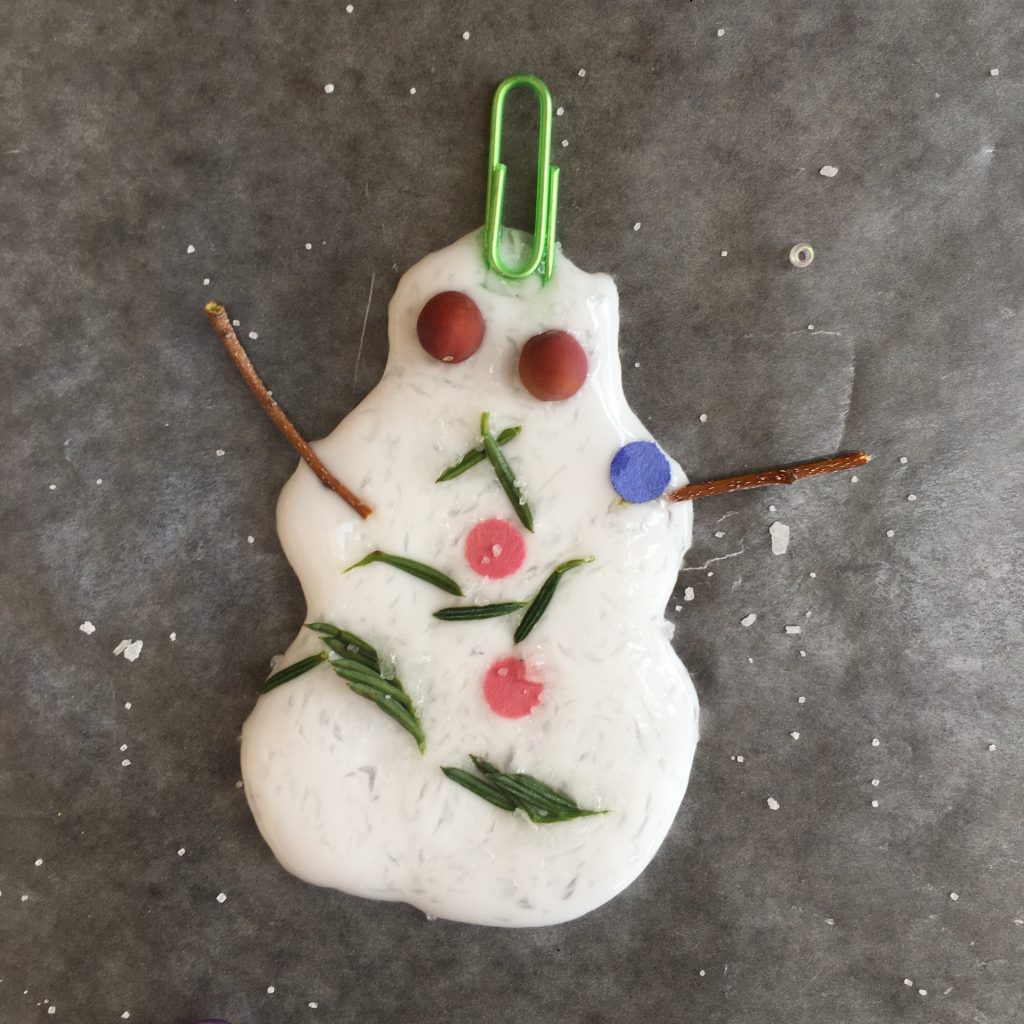
- Place the wax paper or other transparent sheet on top of the tray or baking pan. Optional: Place stencils or cutouts on top of the sheet to act as a drawing guide as your child squeezes the glue. Outlines can also be drawn directly onto the sheet with a pencil or a permanent marker.
- Squeeze the glue onto the sheet to create shapes, images, and designs. (Note: If a glue bottle is difficult for your child to squeeze, pour a bit of glue into a small bowl so they can either use a paintbrush or a spoon to drizzle/spread a couple of layers of glue onto the sheet.)
- Squeeze 1-4 drops of food coloring or liquid watercolor paint on the glue shapes. Mix and/or swirl the colors into the glue using a craft stick, a paintbrush, chopsticks, or a spoon.
- Decorate the glue shapes with bits of paper, glitter, sequins, googly eyes, etc.
- Before the glue dries, place a paper clip (either bent into a v-shape or as-is) onto the “top” of each of the shapes to act as the hanger. (Note: Use a small string or a small, lightweight rubber band if you don’t have a paper clip.)
- Let the glue shapes dry (this could take between 12-36 hours, depending on how much food coloring or liquid watercolor paint you’ve used).
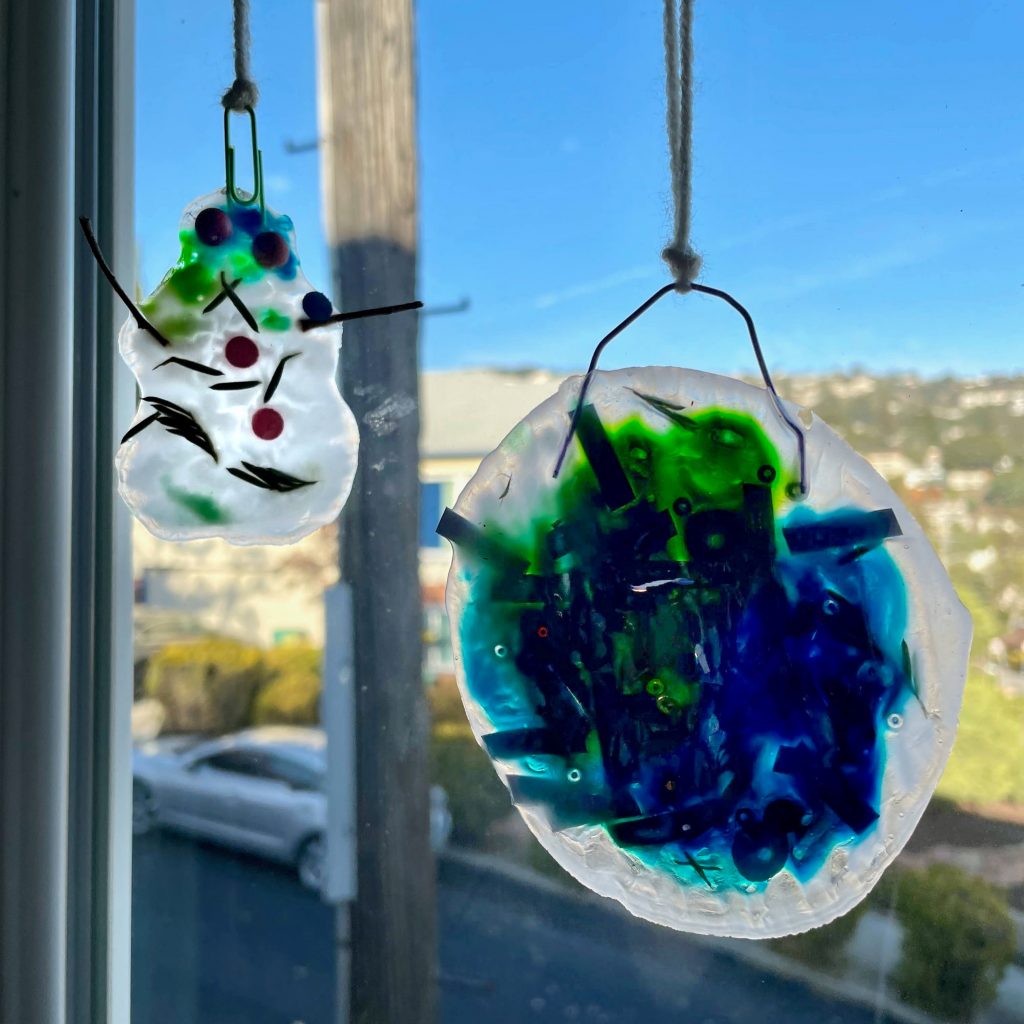
- Once they’re dry, gently peel the glue shapes off of the sheet. Hold them up to a window or a lightbulb to see how the light catches on the translucent parts of them!
- Cut a piece of string or yarn to tie onto the paper clip hangers. Hang the light catchers in a window or near (but not too close to) a lightbulb. Enjoy!
Storage: Stack the light catchers between sheets of wax paper. Store them in a cool, dry place until next winter.
STEM Learning
Many winter decorations are meant to look like ice, so they’re made from materials that are either translucent or transparent, such as glass or plastic. When glue dries, it becomes a translucent material: a little bit of light can pass through it, but it looks “cloudy” and isn’t completely see-through. Window glass is a transparent material: all the light is able to pass through it, so it’s clear or completely see-through. Ask your child, “What are some other things that are translucent or transparent?” Looking at ice and water is a good way to see the difference. When you look at ice, light passes through it, but you (usually) can’t see completely through it. Most of the time, you can see completely through water.
For older children: Check out the first and second pages of this article for simple definitions and activities for observing light.