
(Disclaimer: This page contains affiliate links. If you make a purchase from one of the links, Habitot will receive a small commission at no extra cost to you.)
Making bubble art is a fun, collaborative activity that combines art, science, and movement. Use the power of wind (your breath) to blow bubbles onto a piece of paper to create colorful art! Playing with bubbles is beneficial to children – it aids in the development of visual and physical skills while fostering curiosity, experimentation, and learning.
Note: We recommend trying this activity outside on a calm, non-windy day. Food coloring used to dye the bubbles might stain clothes or furniture, so wear play clothes or an apron, and use a tray or a baking sheet under the paper.
What we’re learning & skills we’re building
- Early science concepts – a soapy solution turns into bubbles when air is added
- Visual tracking skills – bubbles are eye-catching and help children focus on an object and track its movement
- Facial motor skills – children have to shape their mouths in an “O” to blow air in one direction
- Hand-eye coordination – moving a tray around to try to catch bubbles
- Fine motor skills – using the small muscles in the hands to hold a bubble wand or draw with markers
Materials
- Cardstock or paper
- Permanent marking pen, marker or pencil
- Bubble solution (make your own)
- Food coloring or liquid watercolor paints
- Bubble wand (make your own)
- Art tray or baking sheet (alternative: thick cardboard)
Child with Parental Support
- Mix 2-4 drops of food coloring into the bubble solution. You want the bubble solution to be a saturated color so it will leave circle shapes on the paper when the bubbles land and pop. (If the bubble solution is too watery after adding the food dye, add in a drop of dish soap and a 1/2 teaspoon of sugar or honey to thicken it.)
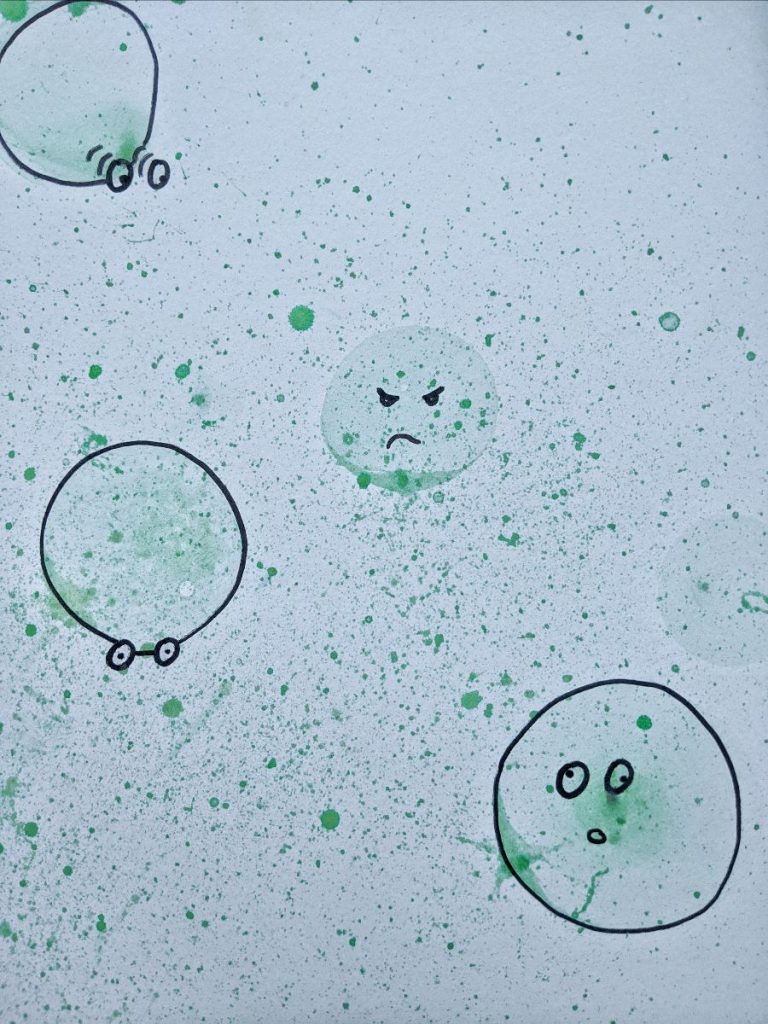
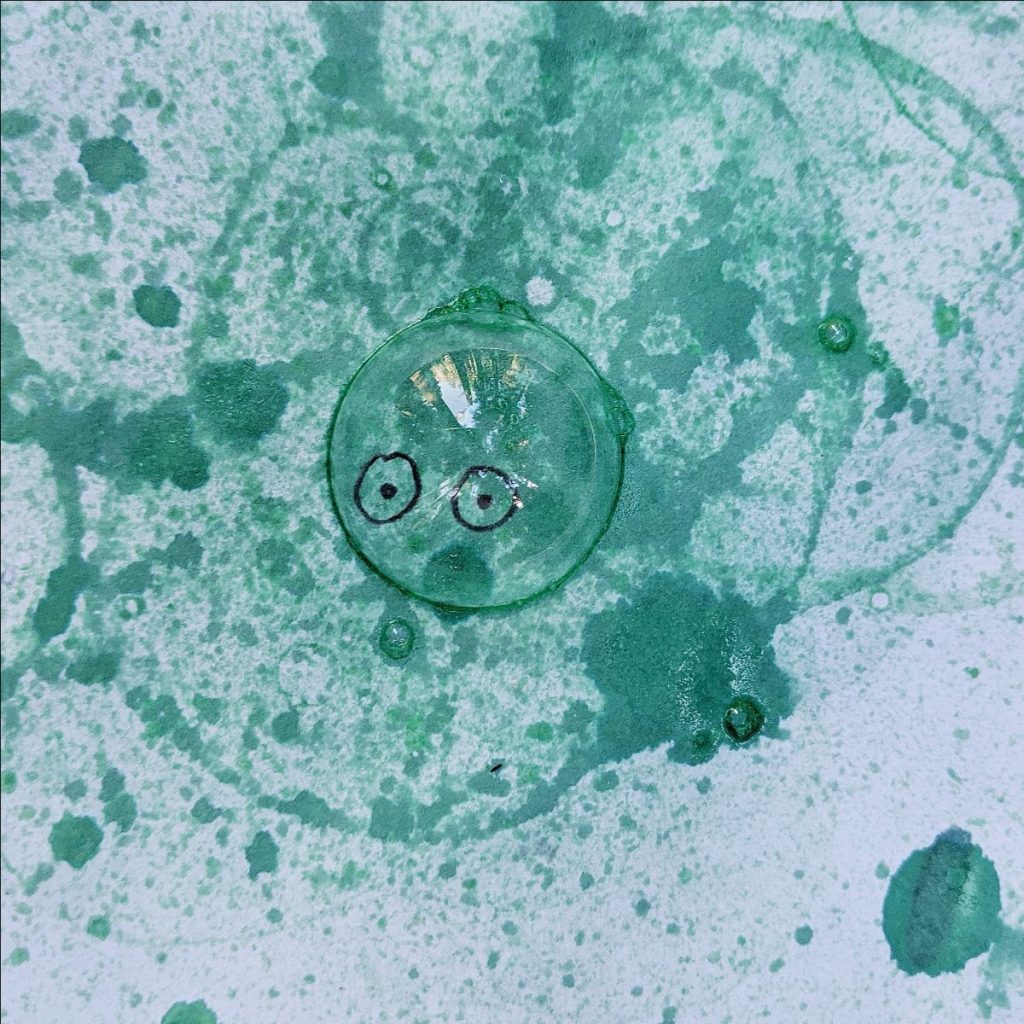
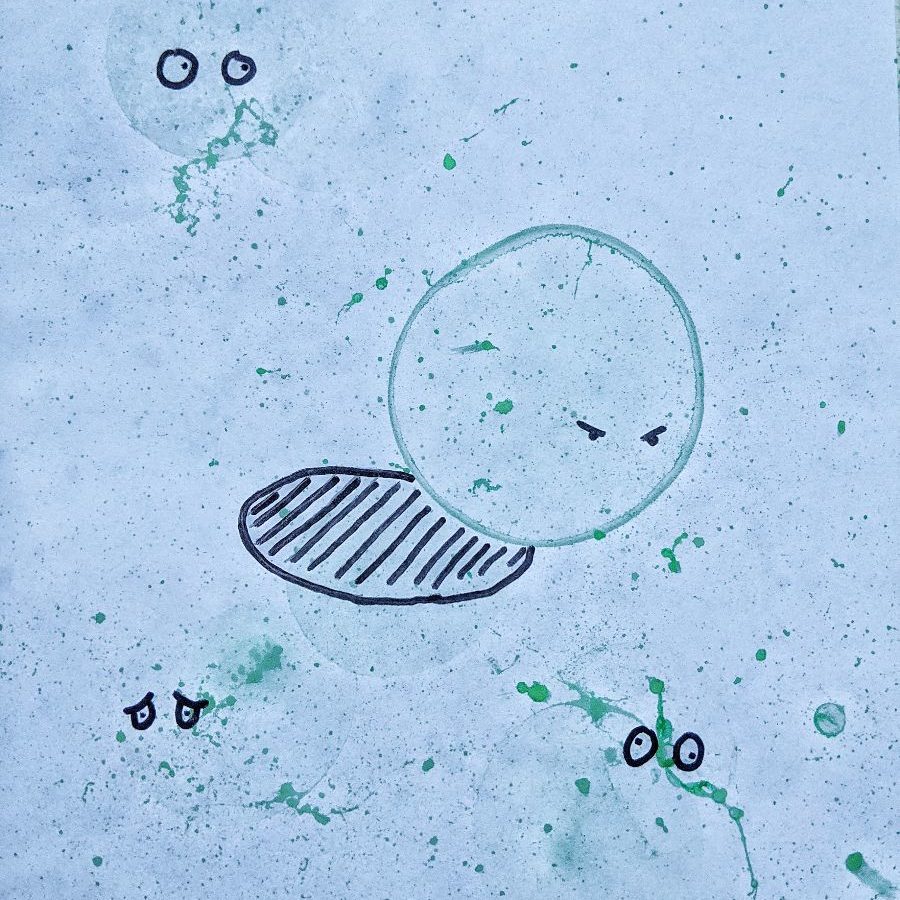
- Draw images on the paper that will be enclosed in the bubbles’ circles once the bubbles pop. We chose to draw eyes to make faces! (Or, you can wait until the bubbles pop to draw.)
- Put the paper on a baking sheet, tray, or large piece of cardboard. Use the bubble wand to blow bubbles in the direction of the paper from about 1 foot away. Move the tray under the falling bubbles to catch them right over the drawings. (You can take turns blowing bubbles or holding the tray.)
- When the paper has dried, add more to the drawings you made before. We’d love to see what you made! Tag us on Instagram or send us a photo!
Bubble Science is Science
OBSERVATION is a big part of being a scientist. Help your child use 4 of their 5 senses to observe and share what they learn about bubbles. Ask:
- (Sight): What colors do you see in the bubbles? What shapes are the bubbles after they’re blown? Are all the bubbles the same size? What shape is a bubble when it lands on a surface?
- (Smell): Does the bubble solution have a scent?
- (Sound): What do the bubbles sound like when they pop?
- (Touch): What does the bubble solution feel like on your hands? How does it feel when the bubbles land on your hands, arms, or face?
WONDERING: Scientists make guesses, or hypotheses, about things they observe. Wondering “why,” and coming up with an idea to answer that “why” is the second big part of being a scientist. For parents, it’s not always necessary to have the answers. In fact, at this young age, it’s great to let your child come up with ideas of their own. Foster their curiosity. Listen to their ideas; how many ideas can they come up with? Encourage them, with “that’s an interesting idea” and “let’s find out” (if your child is ready for more).
More questions you might ask:
- How long does the bubble take to pop once it’s landed on the paper? Does it last longer in the beginning, or after a lot of bubbles have already landed?
- What do you see at the edge of the bubbles after they land? Is it a dark ring? Why?
- (If it’s a sunny day outside) Do the bubbles cast shadows? How does something see-through cast a shadow?
MORE BUBBLE SCIENCE: https://www.kidsdiscover.com/teacherresources/bubbles-for-kids/